
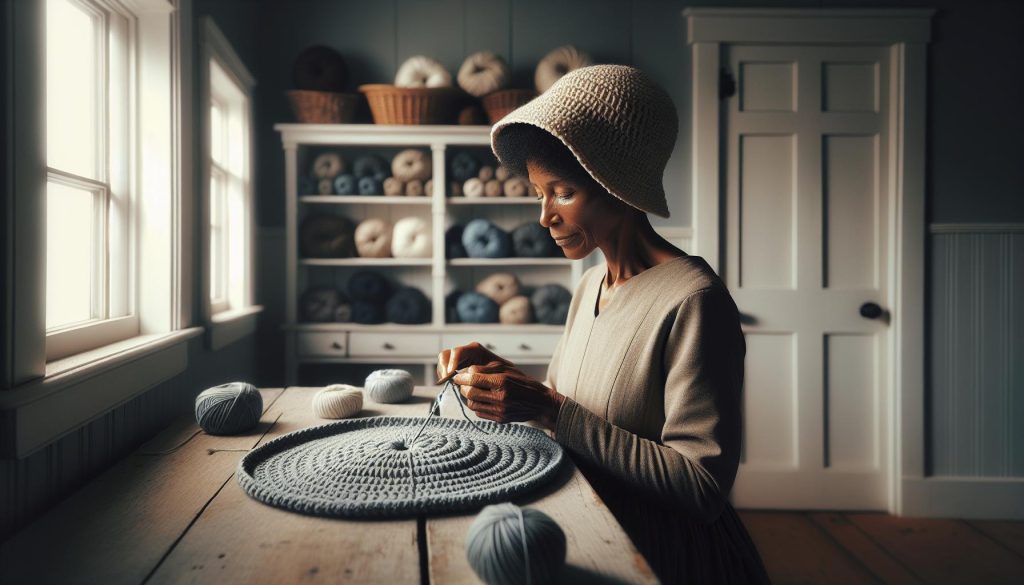
Crocheting a circle hat, especially in the charming flat top Amish-style, is not just a delightful project but also a wonderful way to express your creativity and keep warm. Did you know that this style of hat is not only practical but also steeped in tradition? Whether you’re a beginner looking to expand your skills or a seasoned crafter seeking a fun new challenge, this pattern offers an accessible path to creating a unique accessory that showcases your handiwork.
With minimal materials and only a few hours of your time, you’ll be amazed at what you can create. Plus, the satisfaction of making something with your own two hands is unbeatable! So grab your yarn and hook, and let’s dive in. You can do this! Follow along as we break down the steps and empower you to make your very own circle hat.
Choosing the Right Materials for Your Amish-Style Hat
can make all the difference in both the look and feel of your finished project. The materials you select not only influence the ease with which you can work but also the overall quality and durability of the hat. Plus, using suitable yarn can elevate your creation into a cozy, stylish accessory you’ll love to wear or gift.
First, let’s talk about yarn. For an Amish-style hat, you’ll want to choose a medium to bulky weight yarn that provides both warmth and structure. Wool blends are often the best choice because they’re warm, breathable, and have an inherent elasticity that helps maintain shape. Consider soft, natural fibers like Merino wool for a luxurious feel, or perhaps an acrylic-wool blend if you’re looking for something more budget-friendly and machine washable. Aim for a yarn that has a smooth texture to help your stitching appear even and polished.
Next, your crochet hook size matters too! A hook that is slightly larger than what’s typically suggested for your yarn weight can give your stitches a bit more looseness, allowing your hat to breathe while still maintaining enough density to keep it warm. For a medium weight yarn, a 5.5 mm (I-9) or 6 mm (J-10) hook should work nicely. If you’re unsure, don’t hesitate to make a small swatch to test the stitch gauge-this can help you get a better sense of how your finished hat will fall.
Lastly, don’t forget about the finishing touches! Consider adding unique elements like buttons, tags, or embellishments that can personalize your hat. A simple embellishment can turn a basic piece into something uniquely yours or a special gift for someone else. Gather all your materials before you start, and you’ll be well on your way to crafting a beautiful, functional Amish-style hat you can be proud of!
Understanding the Basics of Crochet Stitches
To create a stunning Amish-style circle hat, understanding crochet stitches is essential-they’re the building blocks that bring your design to life! From the simplest single crochet to more complex stitches, each has a unique role that can transform your project. Whether you’re just starting out or brushing up on your skills, this guide will give you the confidence to navigate the beautiful world of crochet.
One of the foundational stitches you’ll use frequently in your circle hat is the single crochet. This stitch is straightforward, making it an excellent choice for beginners. To execute a single crochet, simply insert your hook into the stitch of the previous row, yarn over, pull through (you’ll have two loops on your hook), yarn over again, and pull through both loops. This creates a tight, sturdy fabric that’s perfect for the main body of your hat. If you’re feeling adventurous, try the double crochet as well; it adds height and can create lovely texture. Remember, practice makes perfect-don’t hesitate to make a few swatches to get comfortable with each stitch!
As you work on your circle hat, you’ll primarily use the chain stitch to start your rows and form the base. To begin, make a slip knot and chain the desired number of stitches according to your pattern. This foundational row is crucial as it sets the stage for the subsequent stitches. If you notice your circle isn’t laying flat, adjusting your tension or the type of stitch can help. A tight circle often benefits from a looser tension, allowing each stitch to breathe while keeping your hat snug and well-structured.
Lastly, adding some variation with shell or popcorn stitches can give your hat unique flair. These stitches create beautiful clusters of texture and can be a fun way to personalize your design. They might seem tricky at first, but with practice, you’ll master them in no time! Embrace the process and remember that every small stitch is a step toward crafting something beautiful. Your circle hat will not only keep you warm but also showcase your individual style and creativity. Remember, you can do this-each stitch brings you closer to your stunning finished piece!
Step-by-Step Guide to Creating the Flat Top
Creating the flat top of your Amish-style circle hat is an exciting step that sets the foundation for the entire project. This distinctive shape not only gives the hat its character but also ensures a comfortable fit on your head. Whether you are a seasoned crocheter or a curious newbie, this guide will help you navigate through the steps effortlessly. You’ll likely find that with patience and practice, mastering this technique is well within your reach!
To get started, gather your materials: a suitable yarn (wool or cotton blends work great), a matching crochet hook, and a pair of scissors. Depending on the pattern you are following, you might also need a stitch marker to help track your rounds. Set aside about 1-2 hours for this part of the project, as it will involve creating several rounds of stitches to build up the height and form of the hat.
Step-by-Step Instructions
- Start with a Magic Circle: Begin by making a magic circle (or adjustable loop). This technique creates a tight center that will form the top of your hat. To do this, wrap the yarn around your fingers to create a loop, then pull the working yarn through the loop.
- Make the First Round: After you’ve established your magic circle, chain 2 to secure your starting point. Then, within the circle, work 12 double crochets. Pull the tail of the yarn to tighten the loop, closing the center. Slip stitch into the top of the first double crochet to close the round.
- Increase for Flatness: To achieve the flat top, you’ll need to increase the number of stitches in each subsequent round. For the second round, chain 2, then make 2 double crochets in each stitch around (total of 24 stitches).
- Continue Increasing: For the next rounds, you’ll want to continue increasing while maintaining that flat shape. A common method is to increase every other stitch. For instance:
– Round 3: 1 double crochet in the next stitch, 2 double crochets in the next stitch (repeat around).
– Round 4: 2 double crochets in the next stitch, 2 double crochets in the next (repeat around).
Keep repeating this pattern, adding more double crochets between increases as you progress until you reach the desired diameter for the flat top of your hat.
- Check Progress: Regularly check the size as you go. The flat top should have a smooth, rounded appearance and lay flat without any puckering. You can place it on your head occasionally to ensure it fits comfortably, echoing the common practice among crocheters to “try it on”!
- Fastening Off: Once you achieve the desired size, cut your yarn, leaving a long tail for sewing later. Pull the tail through the last loop on your hook to secure your stitches.
You’ve just conquered the flat top of your Amish-style circle hat! Celebrate this achievement and prepare to move on to the next exciting step. Remember that each stitch is a testament to your creativity and effort-you’re doing wonderfully. Keep pushing forward, and soon you’ll have a beautiful hat that showcases not only your skills but your unique style!
Achieving Perfect Circle Shape: Tips and Tricks
Achieving a perfect circle shape in your Amish-style circle hat is essential, and it’s one of the most rewarding aspects of crochet! To start, remember that the key to creating a nice, flat circle is all in how you manage your increases. Your goal is to distribute your stitches evenly to prevent puckering or rippling, which can happen if the increases aren’t spaced correctly. With a little bit of practice and these tips, you’ll master this technique in no time!
One effective method is to visualize how your increases will be structured. For instance, in the second round after your magic circle, you should double the stitches – that’s 12 to 24 stitches. From there, follow a pattern of increasing every other stitch or every third stitch based on your comfort level. Here’s a basic guideline:
- Round 3: 1 double crochet, 2 double crochets in the next; repeat.
- Round 4: 2 double crochets in the next stitch; repeat.
- Round 5: 2 double crochets followed by 1 double crochet; repeat.
- Subsequent Rounds: Continue this pattern, adjusting as needed to maintain the circular shape.
As you crochet, it’s important to check your progress frequently. Lay the work flat and see if it maintains a perfect circle without any dips or bulges. Don’t hesitate to place it on your head periodically to double-check the size and shape. If you notice any areas where the fabric isn’t lying flat, you can adjust your tension or stitch count as needed. A smooth circular shape feels like an accomplishment, and your careful attention will make your hat look polished!
When selecting your yarn, consider that heavier weights may lead to a sturdier structure, which can help hold the shape better. As you work through the project, keep in mind that the joy of crocheting is in seeing your creation come to life. It’s a process of discovery-each round adds a layer of your creativity. With practice, you’ll find that achieving that perfect circle is not only possible, but a fun part of making your unique hat! You can do this!
Adding Texture and Design to Your Hat
When it comes to making your Amish-style circle hat stand out, adding texture and design can elevate your project from simple to stunning. Whether you’re a seasoned crocheter or just starting out, incorporating unique elements into your crochet work can be both fun and rewarding. Let’s explore some techniques that will give your hat a visually appealing finish.
One of the simplest ways to introduce texture is by varying your crochet stitches. Instead of sticking to plain single or double crochets throughout, mix things up! Consider adding stitches like *front and back post double crochets*, which create a raised effect. Another option is to incorporate *shell stitches* or *granny squares*, which not only add dimension but can also introduce a vibrant contrast of colors. For instance, using a shell stitch around the brim can create a lovely, wave-like appearance that feels cozy and inviting.
Using Color and Pattern
Color plays a crucial role in the design of your hat. Don’t hesitate to play with color gradients or stripes; these can be achieved easily by changing yarn colors at the beginning of each round or adding stripes as you go. A fun approach is to use a self-striping yarn, which automatically creates a beautiful pattern for you. If you’re feeling adventurous, try incorporating some simple motifs or appliqués on your hat, like flowers or leaves. These can be stitched on after you’ve completed the main body of the hat, making it a great way to personalize your piece further.
Experiment with Edging
Don’t overlook the power of a crafted edging! A decorative border not only provides a finished look but also adds character. You could try a *picot edge* for a delicate touch, or a *crab stitch* for a more defined and sophisticated feel. Take a moment to consider how these edges will frame your hat and choose one that complements your overall design vision.
With these strategies, you can transform a basic crocheted hat into a beautiful, textured masterpiece that’s all your own. Remember, the joy of crocheting lies in unleashing your creativity-so experiment, have fun, and embrace the process. You’ve got this!
Mastering Color Choices for Your Circle Hat
Choosing the right colors for your Amish-style circle hat can transform your creation from ordinary to extraordinary. The palette you select not only reflects your personality but also impacts the overall design and feel of the hat. For starters, consider your favorite colors or those that resonate with you, and let them inspire your project. A well-thought-out color scheme can enhance various crochet techniques, making textures and patterns pop.
To create harmonious color combinations, you might want to explore the color wheel. Here are a few tips to get you started:
- Monochromatic Schemes: Use different shades of a single color. This creates a subtle and elegant look.
- Complementary Colors: Choose colors opposite each other on the wheel, like blue and orange. This can produce a vibrant, eye-catching contrast.
- Analogous Colors: Select colors that are next to each other on the wheel, such as blue, teal, and green, for a serene and pleasing aesthetic.
- Accent Colors: Use a neutral base, like grey or beige, and add pops of brighter colors to draw attention to specific areas.
Experimenting with color gradients can also yield stunning results. For example, utilize a self-striping yarn that transitions between colors as you crochet, effortlessly creating a beautiful, multi-hued effect. This approach saves you time and mixes colors in a way that can be challenging to achieve with solid yarns. If you want to take it a step further, consider incorporating small color blocks or stripes every few rounds to add interest without overwhelming your main design.
Remember, the joy of crocheting your circle hat lies in creative expression. Don’t be afraid to deviate from traditional color choices. Personal motifs or thematic colors can make your hat uniquely yours. Whether it’s a nature-inspired palette of greens and browns or a bright, festival vibe with bold pinks and yellows, your choices will not only demonstrate your style but also encourage others to embrace their creativity. Dive in with confidence-you’ve got this!
Finishing Touches: Edging and Personalization
Adding the final touches to your crochet circle hat is where the magic happens! It’s the moment you transform a simple piece into a personal expression of your style. Edging can not only tidy up the hat but also add a playful or sophisticated flair, depending on your approach. Plus, this is your chance to personalize your creation with unique details that reflect who you are.
Getting Started with Edging
Begin by deciding on the type of edging that complements your hat. A simple scalloped edge can offer a sweet, vintage vibe, while a more structured cross-stitch might lend a modern touch. Whichever method you choose, make sure to maintain consistent tension for a polished finish. For a basic scalloped edge, simply follow this easy sequence:
- Single crochet (sc) in each stitch around the brim.
- In every fifth stitch, create a cluster of three double crochets (dc), followed by a single crochet in the next stitch to form the scallop.
- Continue until you return to the starting point, incorporating your preferred edging style.
Feel free to experiment with contrasting yarn colors for the edging to make it stand out! This can not only frame the hat beautifully but also enhance your color palette and make your hat truly eye-catching.
Personalizing Your Hat
Now comes the fun part: personalization! Think about adding embellishments like flowers, buttons, or even a stylish band. A simple crochet flower can be made with just a few stitches, and it can be securely sewn onto the side or back for a charming detail. For a button accent, choose one that harmonizes with your overall color scheme-wooden buttons offer a rustic touch, while brightly colored ones can inject some playful energy.
Don’t forget about adding your unique signature! If you love a specific type of stitch or texture, include it in your design. Perhaps try a raised stitch to create a quilted effect or stripes for a more playful take on your crochet hat. Remember, the key to successful personalization is to bolden your choices while staying true to your aesthetic.
Embrace your creativity through each edging method and personalization detail you choose. Each stitch you work through should express your passion and enjoyment for creating! You’ve got the skills, and now it’s all about making this hat a reflection of your individuality. So grab your yarn and hooks, and let your unique style shine through in your finished project. Happy crocheting!
Handling Common Mistakes in Crochet Projects
It’s all part of the journey, isn’t it? Even the most seasoned crocheters stumble upon common mistakes while working on their projects, especially with something as intricate as an Amish-style circle hat. Embracing these little hiccups can transform them into learning opportunities, making you a more skilled maker. Here’s the scoop on those pesky pitfalls and how you can navigate around them with confidence and ease.
One of the most frequent issues is losing track of your stitch count. It’s easy to miscount when engrossed in a project! If you find your hat getting wider or narrower than intended, try the following steps to troubleshoot:
- Trace Your Rows: At the end of each round, double-check your stitch count as you go to ensure consistency.
- Use a Stitch Marker: Placing a marker at the end of each round can be a game-changer, helping you easily identify where each row ends and begins.
- Don’t Hesitate to Unravel: If you notice a significant stitch discrepancy, don’t worry! Unravel the last few rounds and redo them. It’s all part of the learning experience!
Another common challenge is dealing with uneven tension, which can create an inconsistent fabric that detracts from your hat’s overall look. Here are a few tips to achieve that beautiful, even tension that every crocheter strives for:
- Practice Makes Perfect: Spend a few minutes warming up with a scrap yarn before diving into your project.
- Relax Your Grip: If you find yourself gripping your yarn or hook too tightly, consciously relax your hands while working.
- Switch Hooks: Sometimes, a different hook size or style can help you create a more comfortable tension. Experiment until you find what feels best!
Finally, color changes can often lead to frustration, particularly with Amish-style patterns featuring multiple shades. To avoid noticeable gaps or uneven blends, consider the following strategies:
- Carry Your Yarn: When changing colors, carry the unused yarn along the side of your work-this minimizes gaps and gives a cleaner edge.
- Practice Transition Stitches: Using slip stitches or chaining a few stitches in the new color can help smooth the transition between colors.
- Check Your Color Sequence: Keep a visual reference of the color order close at hand to prevent any mix-ups!
Remember, every mistake is just a stepping stone on your crafting journey. Celebrate the creative process, and don’t forget to enjoy the journey of making something unique and beautiful. You’ve got this!
Exploring Variations: Customize Your Hat Style
In the world of crochet, your creativity knows no bounds, especially when it comes to customizing your Amish-style circle hat. This project isn’t just about following a pattern; it’s a canvas for your personal expression. Whether you’re a beginner or an advanced crocheter, exploring variations not only enhances your skills but also allows for unique creations that reflect your style.
One way to make your hat stand out is through the use of different yarn types and textures. From soft cottons to luxurious wool blends, each material can give your hat a different feel and aesthetic. You might try using a variegated yarn for a fun, colorful effect, or choose a chunky yarn for a snuggly, warm hat perfect for winter. Don’t shy away from experimenting-mixing fibers can lead to delightful surprises!
Another approach to customization is altering the hat’s shape and structure. While the flat top is a traditional design, you can play with the height of the crown or add a slouchier style according to your preference. To create a unique silhouette, try adding a simple stitch pattern or incorporating ribbing along the base of the hat. Here’s a quick tip: to create ribbing, simply alternate between single crochet and double crochet every few rows. This simple switch can transform the overall look of your hat into something truly special.
Adding embellishments is also a fantastic way to personalize your hat. Think about decorative elements like flowers, patches, or even buttons. You could crochet a flower in a contrasting color to sew on the side or create a textured band around the base. Not only do these details add visual interest, but they also allow you to further showcase your own flair. Each unique touch you add transforms your creation from a standard hat into a one-of-a-kind masterpiece you’ll be proud to wear or gift.
With all these possibilities, remember that the journey of making is just as rewarding as the final product. Embrace your creativity and enjoy the process-after all, you have the power to make something truly unique!
Caring for Your Crochet Circle Hat: Maintenance Tips
Your beautiful handmade circle hat deserves the best care to keep it looking great season after season. Proper maintenance not only protects your creation but also enhances its longevity, letting you enjoy your crafty masterpiece for years to come. Plus, with a few simple steps, keeping your crochet circle hat in tip-top shape can be both easy and satisfying!
Start by knowing how to clean your hat correctly. If you’ve used cotton or acrylic yarn, a mild detergent and a gentle hand wash in lukewarm water is a safe bet. Place your hat in a basin filled with soapy water and gently swirl it around, but avoid wringing or twisting. This approach minimizes the risk of stretching out the fibers. Rinse thoroughly in cool water, making sure all detergent is removed. If your hat has wool, consider using a detergent specifically designed for wool to prevent damage.
Drying Your Circle Hat
After washing, the way you dry your hat is crucial. To avoid any deformation, reshaping is key-lay your hat flat on a clean towel and reshape it to its original form. Avoid hanging it up, as the weight of the wet yarn can stretch your creation out. Let it air dry completely in a cool, shaded area, and never expose it to direct sunlight or a heat source; this could lead to fading or shrinkage.
To keep your hat looking fresh and prevent accumulating dust or lint, store it properly when not in use. A great tip is to use a soft bag or a sturdy box to keep it protected. Avoid folding or crushing it; instead, place it flat to maintain its shape. Finally, consider using a lint roller or a slightly damp cloth to gently remove any dust or dirt that may gather on the hat.
Don’t forget, care is also about your hat’s everyday wear! Rotate your hats regularly, so you’re not always reaching for the same one. This helps lessen the load on any single hat and keeps all of your lovely creations wearable and vibrant. Remember, every stitch you made has a story, and with proper maintenance, your crochet circle hat will continue to tell that story beautifully for many seasons to come!
Inspiration: Real-Life Circle Hat Projects
There’s nothing quite like the satisfaction of wearing something you’ve made yourself, especially when it comes to a stylish and cozy circle hat. Many crocheters have turned this simple pattern into memorable creations that not only reflect their unique tastes but also bring joy to their friends and family. Whether you’re a seasoned maker or just starting out, inspiration can come from the community and the diverse ways others have made this project their own.
One popular example is a vibrant, multicolored Amish-style hat that utilizes a mix of bold and subtle hues. This project highlights the beauty of color combinations; the maker cleverly alternates between different yarns to create a striped effect that pops. This approach is perfect for using up leftover yarn scraps, making the project both sustainable and cost-effective. You can do this too! Try experimenting with your favorite colors or even use a gradient yarn for a beautiful ombre effect.
Another inspiring project features embellishments that add a personal touch. A crochet enthusiast added a lovely flower appliqué to her flat top hat, instantly elevating the piece and making it suitable for spring outings. Consider how you can customize your own hat with buttons, fabric flowers, or even embroidery. These accents are an easy way to express your individuality and make your circle hat stand out in a crowd.
Additionally, many crocheters are sharing their hat creations on social media under hashtags like #CircleHatProject, showcasing their journeys and sharing tips along the way. Scrolling through these posts can ignite your creativity and provide you with real-life examples of color choices, stitch variations, and personalization techniques. Remember, your circle hat can tell your story, and with each stitch, you’re contributing to a community of makers who celebrate the art of crochet. So grab your yarn and hook-your next masterpiece awaits!
Frequently Asked Questions
Q: What yarn is best for crocheting a flat top circle hat?
A: The best yarn for crocheting a flat top circle hat is a medium worsted weight yarn. Look for a yarn that is soft and durable, such as acrylic or a cotton blend, ensuring comfort and longevity. *Remember*, using the recommended yarn weight is crucial for achieving the correct sizing and shape.
Q: How do I adjust the size of my crocheted circle hat?
A: To adjust the size of your crocheted circle hat, simply change the hook size or modify the number of stitches in your initial chain. For a larger hat, use a larger crochet hook or add more stitches in your starting round. Be sure to check the sizing in the step on *achieving perfect circle shape*.
Q: Can I use a different stitch pattern for my circle hat?
A: Yes, you can use various stitch patterns for your circle hat! Consider trying double crochet or half double crochet for different textures. Just ensure these stitches maintain the hat’s circular shape and consult the *adding texture and design* section for inspiration.
Q: How can I add embellishments to my circle hat?
A: You can add embellishments like flowers, buttons, or fabric patches to your circle hat after completing it. Sew them securely to ensure durability. For more ideas, check the *finishing touches* section of your article for creative suggestions on personalization.
Q: What is the recommended crochet hook size for a flat top circle hat?
A: The recommended crochet hook size for a flat top circle hat is usually between 5.0 mm (H) and 6.0 mm (J), depending on your yarn choice and tension. Refer to the yarn label for specific recommendations, and experiment to achieve your desired gauge.
Q: How long does it take to crochet a circle hat?
A: Crocheting a flat top circle hat typically takes between 2 to 4 hours, depending on your skill level and the complexity of the design. *Plan your project time* accordingly, especially if you’re adding intricate patterns or embellishments along the way.
Q: What common mistakes should I avoid when crocheting a circle hat?
A: Common mistakes include not counting stitches accurately, leading to uneven shapes, or using the wrong tension. Always check your work regularly and refer to the *handling common mistakes* section to learn how to correct these issues effectively.
Q: How do I care for my crocheted circle hat?
A: To care for your crocheted circle hat, hand wash it in cold water and lay it flat to dry. Avoid wringing it out to maintain its shape. For maintenance tips and proper cleaning, see the *caring for your crochet circle hat* section in your guide.
Future Outlook
Congratulations on completing your Circle Hat using the Flat Top Amish-Style Pattern! With just a few basic stitches, you’ve created a stunning accessory that showcases your unique style and creativity. Now that you’ve grasped this skill, imagine the possibilities-why not try your hands at a matching scarf or explore other crochet hat patterns?
If you found this project fun, be sure to check out our detailed guide on basic crochet stitches and techniques [[1]], and don’t miss our extensive collection of free crochet projects for beginners [[2]]. Remember, every stitch you master builds your confidence, so don’t hesitate to tackle your next project today!
We’d love to hear about your experience or see your finished hat-share your thoughts in the comments below! If you’re not already subscribed, join our newsletter for more tips, patterns, and inspiration straight to your inbox. Happy crocheting!
Get our latest guides, news, and insights highlighted in your Google Search & AI Overviews.