
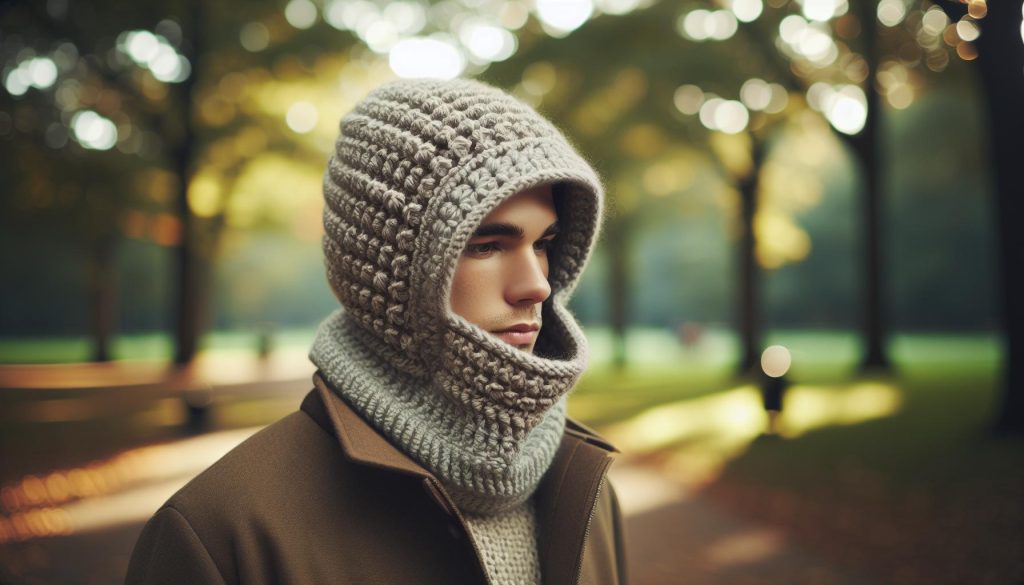
As the chilly seasons approach, staying warm and stylish becomes a top priority, and what better way to do that than by crafting your own Cowl Hat and Hooded Neck Warmer Combo? This versatile accessory not only elevates your winter wardrobe but also provides a cozy wrap that shields you from the cold. Perfect for both beginners and seasoned crocheters, this project is a fun way to hone your skills while creating something practical that you can wear proudly or gift to a loved one. With just a few materials and some straightforward steps, you’ll find that making your cowl is not only achievable, but also incredibly rewarding. So grab your crochet hook and yarn, because this delightful combo is just waiting for your personal touch! Keep reading to discover the materials, techniques, and tips that will make this project a breeze. You can do this!
Cowl Hat Crochet Pattern Overview: What to Expect
Creating a cowl hat is a delightful way to combine style and warmth, perfect for chilly days or fashion-forward outings. This versatile pattern serves not just as a hat but also as a cozy neck warmer, offering the best of both worlds. Whether you’re aiming for a simple accessory to elevate your outfit or a practical piece to fend off the cold, you’ll find this project engaging and achievable. Plus, the blend of functionality and fashion makes it a must-try for crafters at any skill level.
Expect a project that balances ease and creativity. Most cowl hat patterns involve basic stitches, making them accessible for beginners while still allowing room for customization and flair. You’ll primarily work in rounds, creating a seamless look that fits nicely as both a hood and a neck warmer. Anticipate needing around 3 to 5 hours to complete your project, depending on your speed and the complexity of your chosen pattern. This makes it a great weekend endeavor or a quick gift for someone special.
As you dive into your crochet journey, gather the essential materials beforehand to streamline the process. Typical yarn weights for these projects range from worsted to bulky, ensuring warmth without excess bulkiness. You’ll also want to have your favorite crochet hooks on hand, as well as any additional embellishments like buttons or appliqués to give your cowl hat a personal touch. Remember, the key is to enjoy the process, experiment with colors and textures, and make something that truly reflects your style. So grab your yarn and hook-let’s bring that cowl hat to life!
Essential Materials for Your Crochet Project
Gathering the right materials can transform your cowl hat project from just an idea into a cozy reality. Whether you’re a novice or one with more crochet experience, having the right tools will not only make the process smoother but also enhance your creative potential. To kick off this warm and stylish accessory, let’s round up everything you’ll need!
Start with yarn, as it’s the heart of your project. For a comfortable and warm cowl hat, look for wool or acrylic blends in worsted or bulky weight. These options provide warmth without overwhelming bulk. You’ll want about 150-200 yards, depending on the size you’re making. Choosing a yarn in a color that speaks to you can elevate your design-consider variegated or ombre options for a fun twist!
Next, grab your crochet hook. A size I (5.5 mm) or J (6.0 mm) hook works well for worsted-weight yarn, while a size L (8.0 mm) is ideal for bulkier yarns. Don’t forget a pair of scissors and a yarn needle for weaving in those pesky ends once you’re finished. This simple but essential toolkit keeps your workspace organized and your project on track.
Lastly, consider embellishments like buttons, stitch markers, or even unique appliqués to inject your personality into the design. These small details can turn a standard cowl into a statement piece. Remember, you can do this! Embrace the joy of making and let your creativity shine through as you assemble these materials. Happy crocheting!
Step-by-Step Instructions for Beginners

Creating a cozy cowl hat with a hood is not just a fun project, but a wonderfully rewarding one that will keep you warm and stylish. Whether you’re curling up at home or heading out into the brisk air, this versatile piece is sure to become a favorite in your wardrobe. With just a bit of yarn and the right techniques, you can craft a unique and functional accessory that reflects your personal style. You can do this!
To get started, gather your materials and find a quiet, comfortable spot where you can focus. You’ll need your selected yarn, a crochet hook in the appropriate size, scissors, a yarn needle, and possibly some stitch markers to help keep track of your rows. If you like, cozy up with a cup of tea or coffee-making is even more enjoyable when you have your favorite drink on hand!
Here’s a step-by-step guide to help you through the process:
Step-by-Step Instructions
- Begin with a Foundation Chain: Start your project by creating a slip knot on your hook, then chain a length that fits comfortably around your neck. This will typically be around 24-26 inches for an adult size.
- Join in a Round: Once you have your foundation chain, slip stitch to the first chain to form a circle. Be careful not to twist it-this is crucial for a seamless finish!
- Crochet the Base Rows: Work your chosen stitch (single crochet, half double crochet, etc.) around the chain. For a lovely texture, consider alternating stitches or trying a simple pattern. Continue this until you reach your desired height for the cowl.
- Add the Hood: When you’re happy with the height, you can transition into the hood. To do this, simply increase your stitches across the last row so that you have enough fabric to comfortably cover your head. A common approach is to add a few extra stitches for each row until the hood reaches about 10-12 inches in height.
- Finish Off: Once your project is at your desired size, finish your last round, cut the yarn, and use the yarn needle to weave in any loose ends. Make sure your final stitch is secure to prevent unraveling.
- Customize Your Cowl: At this point, you can embellish your cowl hat! Consider adding decorative stitches, buttons, or even a pom-pom on top. This is your chance to make it truly yours!
With a few hours of focused effort, you can create a stunning cowl hat that will not only keep you warm but also showcase your unique crochet style. Remember, it’s all about enjoying the process-so if things don’t go as perfectly as planned, don’t stress! Every stitch brings you closer to mastering your craft. Embrace the journey, celebrate your progress, and happy crocheting!
Advanced Techniques to Enhance Your Design

Adding advanced techniques to your cowl hat can take your crochet project from simple to stunning. One effective way to enhance your design is by playing with different stitch patterns. By introducing ribbing or textured stitches, you can create an eye-catching visual effect. For example, alternating between double crochet and front post double crochet not only adds dimension but also makes the fabric thicker and warmer. This creates a cozy feel, perfect for chilly days. Try practicing a few swatches of different stitches before committing to your cowl to see what resonates with your style!
Another fun technique is incorporating color changes. Whether you use a gradient yarn that shifts hues or change colors every few rows, this method can add a unique flair to your project. If you’re working in rounds, consider using the overlay crochet technique, where you make new stitches on top of existing ones for added texture and pattern. To maintain a clean look, be mindful of where you change colors. Keeping these transitions smooth will enhance the overall design of your cowl.
Don’t forget about adding embellishments. Embroidered designs, appliqués, or even fabric patches can turn your cowl from basic to breathtaking. Think about themes or motifs that reflect your personality or interests. For instance, if you love nature, consider adding embroidered leaves or flowers. This is a fun way to make your project truly yours while practicing your skills in a new medium!
Lastly, consider the finishing touches to elevate your project further. A simple yet effective way to finish your cowl is by adding a border. A contrasting color or a crab stitch border can provide a polished edge and give your piece a professional look. Remember, every small detail adds to the finished product, and taking the time to perfect these elements will result in a beautiful, handcrafted cowl that you’ll be proud to wear or gift. Celebrate your creativity, explore these techniques, and enjoy the crafting journey-you can absolutely do this!
Customizing Your Cowl Hat for Unique Styles
Customizing your cowl hat is an exciting way to showcase your personal style and creativity, transforming a basic pattern into a stunning piece that reflects your personality. One simple method to personalize your cowl is by experimenting with different color palettes. Think about creating ombre effects, stripes, or even using your favorite team colors! By alternating your yarn choices every few rounds or integrating variegated yarn, you can add striking visual interest that will make your cowl stand out.
Embellishments and Textures
Adding embellishments can take your cowl to the next level. Consider incorporating textures through stitches like bobbles or shells, which add depth and tactile interest. You might also try attaching decorative elements like tassels or fabric flowers. If you’re feeling adventurous, you could even sew on patches or beads that represent a hobby or interest of yours. Remember, these embellishments don’t just enhance the look of your project; they also offer a fun, enriching way to express who you are.
Personal Touches
Don’t shy away from customizing the fit of your cowl. You can adjust the length and width based on your preference-longer for extra coziness around the neck or shorter for a snug, chic look. If you’re making this for a gift, think about the recipient’s favorite colors or hobbies to guide your choices. Maybe they would love a cozy neck warmer featuring a rustic stitch pattern in earthy tones, or perhaps a playful design with bright colors for a cheerful touch.
By embracing these customization techniques, you can create a truly unique cowl hat that is not only functional but also a true representation of your crafting journey. Remember, every stitch is a step towards showcasing your creativity and style-so dive in and make something amazing that you can be proud to wear or share with loved ones. You’ve got this!
Troubleshooting Common Crochet Issues
When it comes to crochet projects, everyone faces hiccups from time to time. Whether it’s the dreaded twist in your yarn, missed stitches, or uneven tension, these issues can be frustrating but are completely fixable! Embracing these small challenges is part of the joy in crafting; every mistake presents an opportunity to learn and refine your skills.
Let’s start with the most common issue: uneven tension. If your cowl hat is turning out lumpy or bulky, this usually stems from variable tension in your stitches. To fix this, take a moment to relax your hands. Ensure you’re consistent in your grip on the yarn and hook. If you notice a trend, like tighter stitches at the beginning of rounds, try to consciously loosen up as you work. If you’re struggling, using a larger hook can help even things out, or practice with a scrap yarn until you feel more comfortable.
Another frequent issue is the twist in your cowl. This can happen if the foundation chain is twisted while you’re stitching the first round. To avoid this, lay the chain flat on your lap and check for any spirals before joining with a slip stitch. If you’ve already twisted your cowl, don’t fret! Gently unravel the last stitches until you reach the point of twist, then rejoin, ensuring the chain is flat.
Fixing Mistakes
Every crafter has had that moment of realizing they’ve made a mistake a few rows back. Instead of feeling defeated, take a deep breath! Use a stitch marker to mark your last “correct” stitch. Then, carefully unravel until you reach that point. If you’ve made a mistake in a section that’s already stitched, don’t hesitate to rip back and fix it. This method is often less daunting than it sounds and can be a great chance to improve your technique!
Keep in mind that keeping a relaxed attitude toward these minor issues will enhance your crafting experience. You’re not just working on a project; you’re developing your skills and creating something uniquely yours. Remember, it’s all part of the creative journey. You can do this! Enjoy your crochet adventure and be proud of every stitch you take!
Tips for Selecting the Perfect Yarn
Choosing the right yarn for your cowl hat and hooded neck warmer project can truly make a difference in both the look and feel of your finished creation. The yarn you select affects not only the texture and warmth of the crochet item but also the ease of your crocheting process. Start by thinking about the style you want to achieve and the level of comfort you expect from wearing your cowl. For a cozy, snuggly result, consider yarns made from natural fibers like wool or alpaca, which offer warmth and breathability. If you’re looking for something easy to wash and wear, acrylic blends can be your best friend.
When picking your yarn, you’ll want to pay attention to several factors:
- Weight: Look for a medium weight (Worsted, Category 4) yarn for a balance of warmth and manageability. Bulky yarn can provide extra coziness, while lighter yarns can work if you prefer a drapey finish.
- Fiber Content: Explore various blends! 100% wool provides warmth and elasticity, while acrylic is budget-friendly and machine washable. Blends (like wool-acrylic) can honor both softness and durability.
- Yarn Texture: Consider if you want a smooth yarn or textured yarn that might create interesting patterns. Boucle or fluffy yarn can add a unique twist but may be trickier to work with for beginners.
- Color and Dye Lot: Choose colors that inspire you! Be mindful of dye lots to ensure consistency, particularly if you’re buying multiple skeins. Check for similar dye lot numbers on the label.
Before diving into your project, don’t hesitate to grab a few skeins and do a test swatch. This small effort will help you verify how the yarn feels when crocheted and ensure it behaves as expected with the stitches you plan to use. Plus, it’s a great way to experiment with different colors or even stitch patterns before committing your entire project to one yarn.
Finally, remember that selecting yarn should be fun! Enjoy exploring different textures and colors, and don’t shy away from asking fellow crafters for their favorites. Trust your instincts, and you’ll find just the right yarn that not only enhances your cowl hat design but also makes the process of creation a joyous adventure. You can do this, and your cozy winter accessory is just a few stitches away!
Inspiring Cowl Hat Crochet Variations
Exploring variations of cowl hats can ignite your creativity and enhance your skills, making every piece uniquely yours. Whether you’re drawn to vibrant colors, playful textures, or innovative designs, there’s a world of options to consider. Encourage yourself to experiment with different stitches, yarns, or embellishments, and remember, every cowl hat you create is a personal expression.
Creative Design Ideas
Start by considering the basic structure of the cowl hat. You could modify the traditional cowl into a more contemporary look by incorporating contrasting colors. Try using a color-changing yarn or create stripes with two or three different colors to give your cowl a fresh twist. If you’re feeling adventurous, you might even explore gradient yarns that transition from one color to another, adding a beautiful flow to your piece.
Texture and Stitches
Texture adds depth and interest to your project. Consider using stitches like the puff stitch, bobble stitch, or even a braided or shell stitch for a tactile appeal. These techniques can elevate the standard appearance of the cowl, introducing unique patterns that catch the eye. For a truly standout design, try combining these stitches in one project-start with a base of single crochet, then switch to a textured stitch for the body of the cowl, and finish with a simple border.
Personal Touches
Don’t hesitate to add personal touches to your cowl hat. Buttons, embroidery, or appliqués can really make a project shine. Perhaps an oversized button at the front serves both a functional and decorative purpose. If you’re aiming for a more bohemian look, crochet some flowers or leaves to attach as embellishments. Each added detail tells a story and makes the hat feel special.
Remember, there are no rules in crafting-just possibilities! You can do this, and with every stitch, you’re not just creating warm accessories; you’re bringing your vision to life. Dive into your yarn stash, let your imagination soar, and enjoy the process of making something that reflects you. Happy crafting!
Caring for Your Finished Crochet Projects
Taking care of your finished crochet projects, like your cozy cowl hat, is essential to keep them looking fabulous and lasting for many seasons to come. You’ve invested your time and creativity into this piece, so treating it well will ensure it remains a cherished accessory in your wardrobe. With just a few simple steps, you can maintain the beauty and integrity of your cowl hat for years.
For general cleaning, it’s important to follow the care instructions specific to the yarn you used. Most crochet hats made from acrylic or synthetic fibers can be machine washed on a gentle cycle. However, natural fibers like wool or cotton might benefit from hand washing in cool water with a mild detergent. Here’s a quick guide to help you:
- Machine Washing: Place your cowl hat in a mesh laundry bag to protect its shape. Use a gentle cycle with cold water and a mild detergent.
- Hand Washing: Fill a basin with cool water and add a small amount of mild detergent. Submerge your cowl and gently agitate the water. Rinse thoroughly with cool water.
- Drying: Always reshape your cowl while it’s damp. Lay it flat on a clean towel, roll it up to remove excess water, and then lay it flat to air dry away from direct sunlight.
Another aspect of care to consider is how to store your cowl hat when it’s not in use. Keeping it in a cool, dry place will help prevent any moisture-related issues. Avoid hanging your crochet projects, as this can stretch the fabric. Instead, fold your cowl neatly, perhaps even keep it in a dedicated drawer or a storage bin. If you’re using yarn with delicate embellishments, make sure it’s stored away from sharp objects that may snag or pull on the yarn.
Finally, regular inspections for pilling or any loose threads are crucial. If you notice any pilling, you can use a lint shaver or a small pair of scissors to carefully remove the pills without damaging the fabric. Repair any loose threads by weaving them back into the crochet fabric. These small maintenance tasks will keep your cowl looking as vibrant and inviting as the day you finished it.
By treating your finished crochet projects with love and care, you can keep them looking fresh and new, ready for all your adventures. Every time you wear your cowl hat, you’ll feel that warm sense of pride in your handiwork, knowing you’ve taken the best care possible. Happy crafting and caring!
How to Market Your Crochet Creations
Ready to turn your beautiful cowl hat crochet creations into a thriving little business? You’re not alone-many crafters wish to share their unique designs and make a little extra money doing what they love. With the right approach, you can effectively market your crochet creations and find eager customers. Let’s dive into some strategies that will help you get started!
First things first, showcasing your work beautifully is essential. Invest time in taking high-quality photos that highlight your cowl hat from different angles. Use natural lighting and appealing backgrounds to make your hats pop. Include close-ups of stitch details or special features, like unique yarn textures or colors. Consider creating a simple flat lay that includes accessories or coordinating items. This not only captures attention but also hints at how buyers can incorporate your cowl into their wardrobe.
Once your visuals are ready, choose the platforms that resonate most with your target audience. Social media platforms like Instagram and Pinterest are fantastic for showcasing creative work. Use relevant hashtags such as #CrochetCowl or #HandmadeAccessories to increase visibility. Don’t forget to engage with followers-respond to comments, share behind-the-scenes looks at your crafting process, and maybe even go live to demonstrate crocheting techniques. Building a community around your creations can lead to loyal customers who feel connected to you and your work.
Sell Online and at Local Markets
Next, consider how you want to sell your creations. Online marketplaces like Etsy or Shopify make it easy to set up shop without needing extensive technical knowledge. Create detailed listings with well-thought-out descriptions that not only explain the product but also share the story behind it-what inspired your design, the love you put into it, and tips on how to care for the item. Alternatively, selling at local craft fairs or farmers’ markets can help you reach customers face-to-face, letting them feel the quality of your work firsthand. Plus, it’s a great way to network with other local artisans and crafters!
Customize and Promote
Don’t be afraid to experiment with customization options, too! Offering personalized touches-like the choice of colors or size adjustments-can make your cowl hat stand out. Highlight these options in your marketing materials. Community engagement is key; join local crafting groups or online forums where you can share tips and promote your products. Collaboration with other crafters or influencers can also expand your visibility.
The joy of creating is magnified when you can share it with others, so believe in your creations and connect your passion for crochet with customers eager to join your craft journey. Remember, every little effort counts, and your creativity is worth celebrating! You’ve got this!
Connecting with the Crochet Community Online
Finding your place within the vibrant crochet community can be one of the most rewarding aspects of your crafting journey. Sharing your cowl hat creations and connecting with fellow enthusiasts not only enhances your skills but also fuels your passion. Think of online platforms as bustling marketplaces where ideas flourish and friendships form. Whether you’re posting photos of your latest hooded neck warmer or seeking advice on tricky stitches, the online crochet community is always there to support you.
Start by immersing yourself in social media groups dedicated to crochet. Platforms like Facebook and Instagram host countless groups where members share patterns, tips, and project photos. Participating in these communities can provide inspiration and motivation. Don’t hesitate to ask questions; you’ll find that most experienced crafters are eager to help newcomers. Use hashtags such as #CrochetCommunity or #CowlHatCrochet to discover content related to your interests. These vibrant interactions can spark ideas for customizing your designs or troubleshooting common crochet issues.
Another fantastic way to connect is by joining crochet forums, like Ravelry, where crafters from around the globe gather. You can discuss patterns, share your work, and seek feedback from others who understand the joy and challenges of crafting. Participating in crochet-alongs (CALs) is another superb way to meet like-minded creators. These events often focus on a specific project, offering a structured timeline and community support that can help keep you motivated. Remember, it’s about sharing the joy of creating together, enhancing your skills in the process.
Finally, consider starting your own blog or Instagram account focused on your crochet journey. Share your successes, challenges, and experiences with others. You’ll be surprised at how many people resonate with your story and want to connect. Not only does this foster relationships, but it also creates a platform for you to share techniques and personal touches you’ve developed in your cowl hat crochet projects. Together, we can empower and inspire each other to create beautiful works of art-so dive in and start connecting today!
Q&A
Q: What is a cowl hat crochet pattern for beginners?
A: A cowl hat crochet pattern for beginners typically includes simple stitches and clear instructions, making it accessible for new crocheters. Look for patterns labeled as “easy” or “beginner-friendly” that demonstrate step-by-step techniques, allowing you to create a cozy hooded neck warmer combo with confidence.
Q: How long does it take to crochet a cowl hat?
A: Crocheting a cowl hat generally takes about 2 to 5 hours, depending on your skill level and the complexity of the pattern. More intricate designs may require additional time, so choose a pattern that matches your experience and keep your crochet sessions enjoyable and pressure-free.
Q: What yarn is best for a cowl hat crochet pattern?
A: The best yarn for a cowl hat is typically a soft, medium-weight yarn like acrylic or wool blends. These yarn types provide warmth and comfort. For optimal results, refer to the “Tips for Selecting the Perfect Yarn” section in your crochet article for specific recommendations matched to your pattern.
Q: Can I customize my cowl hat crochet pattern?
A: Yes, you can fully customize your cowl hat crochet pattern! Consider altering the stitch pattern, adjusting the size, or adding embellishments like buttons or flowers. Check the “Customizing Your Cowl Hat for Unique Styles” section for inspiration to make your project truly one-of-a-kind.
Q: What tools do I need to crochet a cowl hat?
A: Essential tools for crocheting a cowl hat include a crochet hook (appropriate size for your yarn), scissors, and a yarn needle for weaving in ends. Having a measuring tape handy is also helpful for ensuring your piece fits as intended.
Q: What are common mistakes to avoid when crocheting a cowl hat?
A: Common mistakes include tension issues, not using the correct yarn weight, and overlooking pattern instructions. To troubleshoot effectively, consult the “Troubleshooting Common Crochet Issues” section of your article for strategies to correct these problems as you crochet your cowl hat.
Q: Is there a difference between a cowl and a cowl hat?
A: Yes, a cowl is typically a tubular piece of fabric worn around the neck, while a cowl hat combines this feature with a hood. The cowl hat offers additional warmth and style, perfect for chilly weather. Explore variations in the “Inspiring Cowl Hat Crochet Variations” section for creative ideas.
Q: Where can I find free cowl hat crochet patterns?
A: Free cowl hat crochet patterns are widely available on craft blogs, YouTube channels, and crochet community websites. Browsing platforms like Ravelry or Pinterest can lead you to numerous designs. Don’t forget to check your article’s dedicated resources for potential links!
Insights and Conclusions
Congratulations on completing your Cowl Hat Crochet Pattern: Hooded Neck Warmer Combo! You’ve crafted a versatile piece that’s not only warm but stylish. Whether you’re new to crochet or have some experience, this project is designed to boost your confidence and skills. Now that you’ve finished, why not share your creation with us in the comments? We’d love to see your unique twist!
If you enjoyed this pattern, check out our other crocheted accessories like the Cozy Scarf Pattern or the Fingerless Gloves Tutorial for more ways to stay warm this season. Don’t forget to subscribe to our newsletter for exclusive access to new patterns and crafting tips straight to your inbox. Ready to dive deeper into the world of crochet? Explore more tutorials and resources on our site to keep your creativity flowing. Let’s continue this crafting journey together!
Get our latest guides, news, and insights highlighted in your Google Search & AI Overviews.