
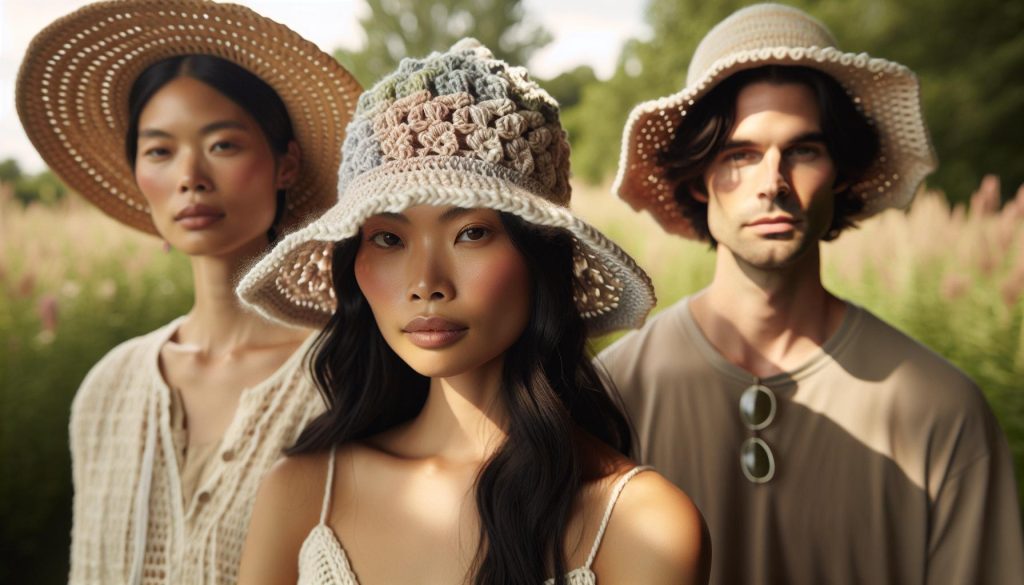
When the summer sun shines bright, a handmade crochet hat can be your stylish companion, offering both flair and protection. In “Crochet Summer Hat Pattern: Breezy Styles for Warm Days,” you’ll discover designs that blend comfort and trend for those warm afternoons. Crafting your own summer hat isn’t just about aesthetics-it’s a wonderful way to express your creativity while ensuring you stay cool and shaded.
You might be wondering how to get started or if you’ll have the time, but worry not! These patterns are designed for all skill levels, featuring easy-to-follow steps and materials that won’t break the bank. By the end of this guide, you’ll feel empowered to make a stunning piece that not only elevates your summer wardrobe but also enhances your crochet skills. Ready to dive into some delightful designs? Let’s create a sun-ready hat that you can wear with pride!
Choosing the Right Yarn for Your Crochet Summer Hat
Choosing the right yarn is crucial for creating a summer hat that’s not only stylish but also comfortable and practical for warm days. Breathability and lightweight properties should be at the top of your list when selecting yarn for summer projects. Natural fibers like cotton and bamboo are excellent choices as they allow air to circulate and keep your head cool. They also have a soft drape, making them perfect for hats that need to hold their shape without being stiff or restrictive. For those who want a blend, look for yarns that mix cotton with a touch of acrylic for added durability while still retaining comfort.
When considering weight, lighter yarns such as worsted or DK are typically ideal for summer hats. They provide sufficient coverage from the sun without being overly bulky, ensuring you don’t overheat. Pay attention to the yarn label for care instructions and its intended use. A gentle wash and quick dry are often preferred for summer hats, so choose yarns that can withstand frequent laundering after a day at the beach or a picnic in the park.
Additionally, think about the color and texture of your yarn. Lighter colors reflect sunlight, which is a great strategy for staying cool, while darker pigments absorb more heat. Textured yarns, like those with subtle slubs or fresh variegation, can add playful interest to your summer hat design, making it as fun to wear as it is to make. To get started, gather a few swatches using different yarns you’re considering-this will allow you to see how they feel in your hands and how they work up, helping you decide what will be the most enjoyable for your crochet adventure.
Remember, this is about what works best for you and your style. Embrace the process, and enjoy the creativity that comes with making something uniquely yours!
Essential Tools for Crafting Summer Hats
Crafting summer hats can be a fun and rewarding experience, and having the right tools makes all the difference! Whether you’re an experienced crocheter or just starting out, equipping yourself with the essential tools ensures smooth sailing as you work on your stylish creations. From yarn choices to accessories, let’s dive into what you need to get started.
First up, a set of quality crochet hooks is a must-have. Consider investing in ergonomic hooks since they’ll keep your hands comfortable during long crafting sessions. Sizes G (4mm) to I (5.5mm) are commonly used for summer hats, but always check your pattern for specific size recommendations. You might also want to have a flexible measuring tape on hand for taking accurate head measurements, ensuring that your hat fits just right.
Another important tool is a yarn needle for weaving in ends and seaming pieces together. A pair of scissors is also essential-look for small, sharp ones that are easy to maneuver, making snipping quick and effective. Additionally, stitch markers can really come in handy, especially if you’re working a pattern with increases or decreases. They help keep track of stitch counts without constantly counting over again, allowing you to focus on the fun of crocheting!
Lastly, having a notebook or digital app to jot down your notes and adjustments while you crochet can boost your crafting confidence. These notes will serve as reminders for modifications or techniques you liked, making each subsequent hat even better. Remember, the process is just as enjoyable as the finished product, and with these tools, you’re well on your way to crafting beautiful summer hats that you’ll love to wear and show off. You’ve got this-embrace the creativity and make something uniquely yours!
Step-by-Step Guide to Basic Hat Construction
Creating your own summer hat is a delightful way to express your creativity while also making something functional for your sunny outings. Whether you’re lounging on the beach or enjoying a picnic in the park, a crocheted hat adds a personal touch that store-bought options simply can’t match. Plus, the satisfaction of wearing something you crafted with your own hands is unbeatable. Ready to dive in? Let’s break down the construction process step-by-step!
Gather Your Materials
Before you start, make sure you have everything you need within reach. Here’s a quick list of materials for a basic summer hat:
- Yarn: Choose a lightweight cotton or cotton blend for breathability.
- Crochet Hooks: Sizes G (4mm) or H (5mm) typically work well.
- Yarn Needle: For weaving in ends and joining pieces.
- Scissors: A small, sharp pair will do the trick.
- Measuring Tape: Essential for sizing your hat accurately.
- Stitch Markers: Helpful for keeping track of your rounds.
With your materials ready, you can set aside a couple of hours to work on this project. Choose a cozy spot because you’re going to want to enjoy this process!
Step-by-Step Construction
Now, let’s get to the fun part-actually making the hat! Here’s a simple method for crafting a basic crochet summer hat:
- Start with the Top: Begin by creating a magic circle. This gives you a nice, adjustable starting point. Make 6 single crochets (sc) into the ring. Pull the circle tight, and join with a slip stitch (sl st) to the first sc.
- Increase Rounds: For the next rounds, you’ll be increasing to create the hat shape. In round 2, make two sc in each stitch (12 sc total). In round 3, increase in every second stitch (18 sc). Continue increasing this way until the circle is large enough for the crown of your head (generally around 5-6 inches in diameter).
- Half Double Crochet (HDC) for Sides: Once your crown is ready, switch to half double crochet (HDC) stitches to start forming the sides of the hat. Work in rounds, keeping the stitch count consistent to avoid unwanted bulges.
- Lengthening the Body: Continue with HDC until the hat reaches your desired height. Typically, 4-5 inches is ideal for a comfortable fit.
- Brim Time: Now it’s time to add the brim! For a floppy look, you can use double crochet (DC) stitches. Start to increase your stitches in the next rounds-the more you space out your increases, the floppier the brim will look. Aim for a width of about 3-4 inches for a wide-brimmed style.
- Finishing Touches: Once you’ve reached your desired length for the brim, finish off by weaving in all your ends with the yarn needle. You can also add a decorative stitch or embellishment at this point to personalize your hat!
Creating a summer hat is as straightforward as it is satisfying. Don’t be afraid to add your spin on this basic design! You can experiment with colors, textures, and embellishments like flowers or ribbons to make your hat uniquely yours. Embrace the joy of crafting, and remember, practice makes perfect. So grab your yarn and hook-you’re going to create something wonderful!
Advanced Techniques for Stylish Finishing Touches
Once you’ve crafted your beautiful summer hat, it’s time to bring that finishing touch that transforms a simple project into a stunning accessory. The finishing touches can elevate your work and provide that polished look you’re after. Here are some advanced techniques to consider that will not only beautify your hat but also strengthen it structurally.
Adding a Decorative Edge
One way to elevate your hat is by adding a decorative edge to the brim. A simple shell stitch or picot edge can make a tremendous difference. To add a shell stitch, you would typically work five double crochets (DC) in the same stitch, skipping a stitch beforehand. This creates a lovely ruffled effect that’s perfect for summer hats. Alternatively, picot stitches-created by chaining three stitches and slip stitching back into the first chain-offer a cute, bobbly finish. Experiment with these stitches around the brim, and you’ll see how these little details create a big impact.
Creating Textured Patterns
Incorporating textured patterns into your hat can significantly enhance its aesthetic. Techniques such as post stitches-linking back to stitches from previous rows-add depth and make the fabric more dynamic. For example, using front post double crochet (FPDC) followed by back post double crochet (BPDC) creates a lovely ribbed effect. This technique not only looks appealing but also adds extra warmth. Remember to practice these stitches on a swatch before applying them to your hat, and you’ll soon grasp the feel and rhythm necessary for a neat finish.
Personalized Embellishments
Don’t shy away from personalizing your hat with unique embellishments. Think about adding flowers, leaves, or even a band made from contrasting yarn. You could crochet a flower separately and sew it onto the side of your hat for a striking visual, or use a wide ribbon to create a chic, classy band around the brim. These elements can reflect your style or match your summer outfits seamlessly!
Blocking for Perfect Shape
Finally, blocking is a technique often overlooked but crucial for achieving a perfect finish. By wetting your hat and shaping it over a bowl or a head form, you help set the fabric into your desired shape. This step can help smooth out any irregularities and really showcase your work. Once you’re done, let it dry completely before wearing it out on those sunny days.
Incorporating these advanced techniques is not just about aesthetics; it’s about celebrating your creativity. Each detail you add tells your unique story and makes your hat truly yours. So grab your hooks, let your imagination soar, and see how fun it is to create one-of-a-kind summer hats! You can absolutely do this!
Top Crochet Stitches for Breezy Summer Designs
When crafting a summer hat, selecting the right crochet stitches can transform your design, making it airy and stylish. Breezy stitches not only enhance the visual appeal but also help keep you cool on warm days. Here’s a closer look at some standout crochet stitches that are perfect for your summer hat projects.
Lightweight Stitches
Choosing lightweight crochet stitches will allow air to flow through your hat, keeping you comfortable. A popular choice is the shell stitch, where you work multiple double crochets into the same stitch. This creates a lovely ruffled effect while leaving gaps for ventilation. Another fantastic option is the v-stitch, made by crocheting a double crochet followed by a chain, and then another double crochet in the same space. The open spaces make it perfect for summer!
Textured Styles
Textured stitches can add depth and interest while maintaining that breezy feel. The granny stitch, made up of clusters of double crochets separated by chains, is both easy to learn and offers a light, open fabric. If you want something a bit more intricate, try the crossed double crochet stitch. It involves crossing stitches over each other, which creates beautiful patterns while remaining airy. Both of these stitches can be mixed and matched for a unique look.
Fun Variations
For those who want to elevate their hat even further, incorporating stitches like the fan stitch-which clusters several double crochets together followed by chains-can create beautiful waves reminiscent of summer breezes. Additionally, if you’re feeling adventurous, the pineapple stitch can add a touch of elegance and intricate design, though it may require a bit more practice to master.
Experimenting with these stitches will not only make your summer hat a standout piece but will also help build your crochet skills. Take your time, have fun, and remember that each stitch is a step toward creating something uniquely yours. You’ve got this, and those sunny days will be all the better for your handcrafted creations!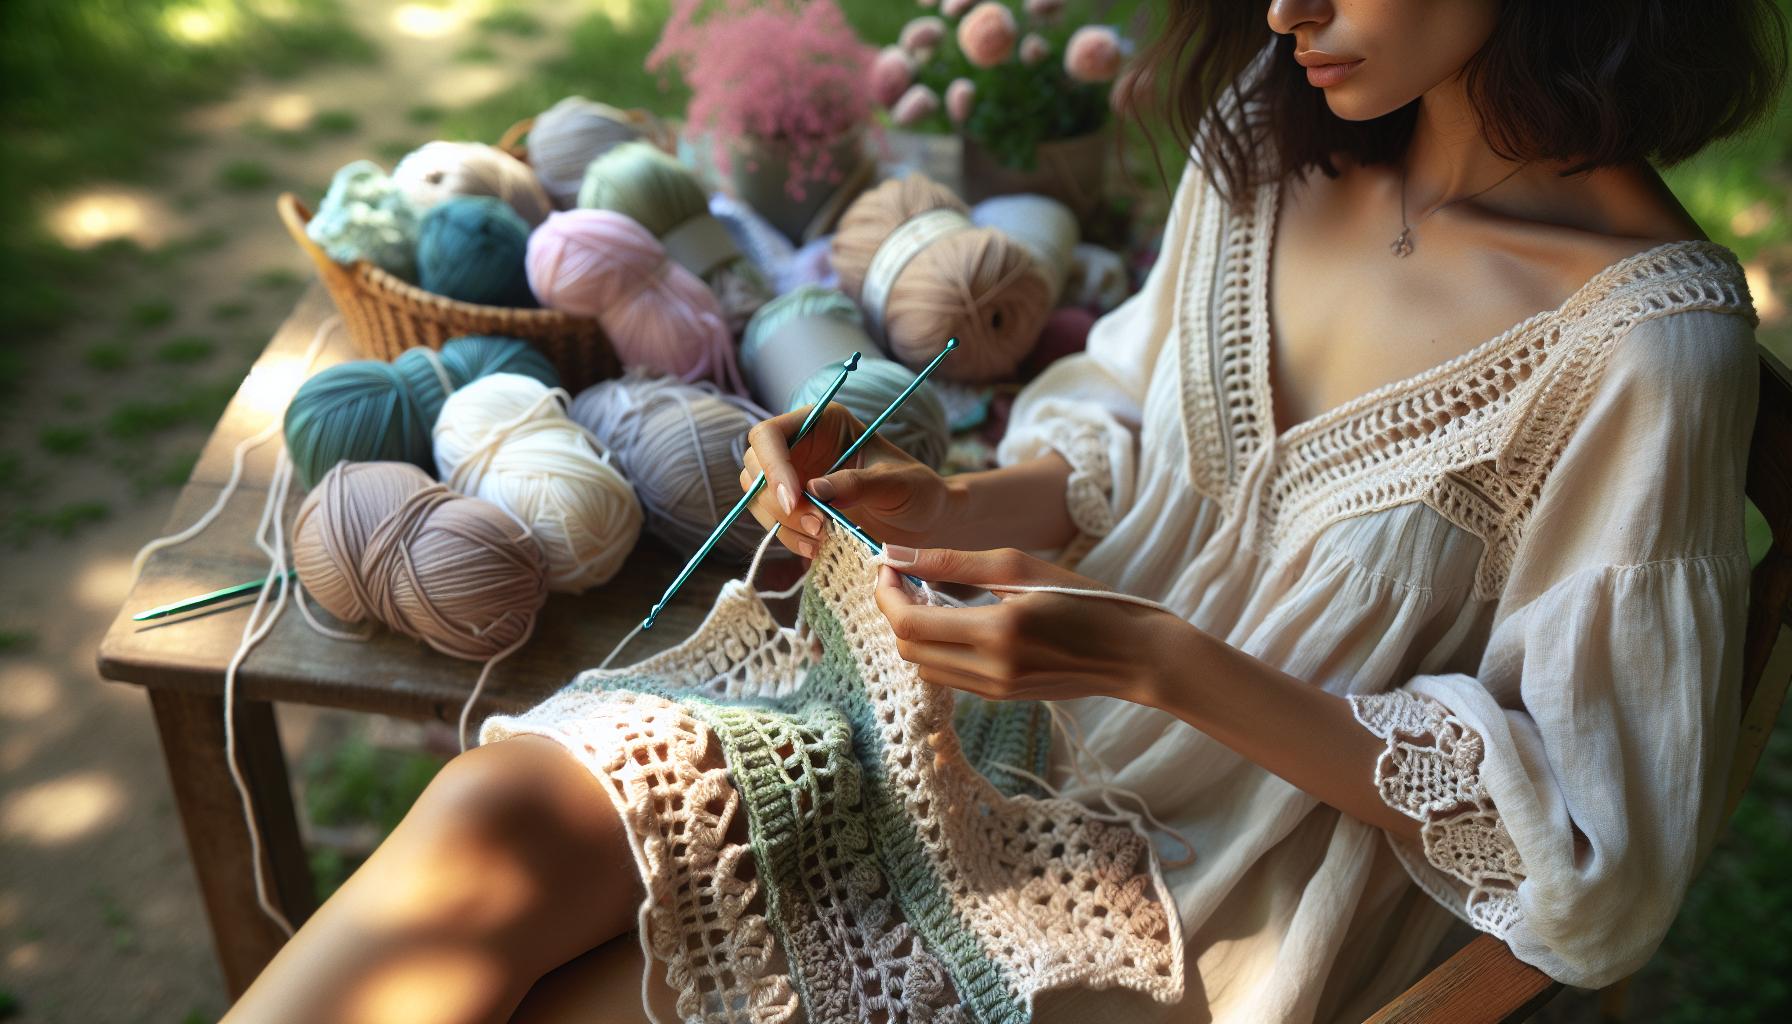
Customizing Your Hat: Sizes and Fits for Everyone
When it comes to creating the perfect summer hat, getting the right fit and size is essential. A hat that doesn’t sit properly can ruin your whole look, and it can also be uncomfortable, especially during those sunny days. The great news? Customizing your hat is not as complicated as it may seem. With some straightforward adjustments and measurements, you can craft a hat that’ll not only feel great but also look fantastic!
First, let’s talk about measurements. To ensure a perfect fit, start by measuring the circumference of your head. Use a soft measuring tape and wrap it around your forehead, just above your ears, where the hat will sit. Write this measurement down! If you’re making a hat for someone else, be sure to ask for their measurements as well-it’s a crucial step. Once you have your measurements, refer to a size chart to determine the appropriate number of stitches to start with. This will help you scale your pattern based on the size you need, whether it’s a child’s hat or one that fits an adult.
- Adjusting Hat Depth: Depending on your preference, you can modify the number of rows in the body of the hat to make it shallower or deeper. A shallower hat is great for a casual look, while a deeper fit can provide more coverage from the sun.
- Brim Size: Customizing the brim is another fantastic way to tailor your crochet hat. You can crochet a wider brim for more sun protection or a narrow one for a trendy style. Simply increase or decrease the number of stitches in the brim round to achieve the desired width.
Lastly, think about the style of the hat. A bucket hat, sun hat, or even a simple cap can all be adjusted in size and fit. If you’re feeling adventurous, try adding adjustable bands or ties for a more custom fit. This not only gives a functional adjustment option but also adds a decorative element to your hat. Remember, the beauty of crocheting your own hat is in the personalization-don’t be afraid to experiment with different styles and fits until you find what works best for you!
By following these steps, you can create a summer hat that fits perfectly and matches your unique style. Embrace the maker spirit, enjoy the process, and remember: with every crochet stitch, you’re one step closer to a beautiful, comfortable summer accessory. You can do this!
Adding Fun Embellishments to Your Crochet Hats
The beauty of crochet lies not just in the construction of the piece, but in the personalization that comes through embellishments. Adding fun touches to your summer hat can elevate your creation from a simple project to a stunning accessory that’s sure to turn heads. Whether you’re a beginner or an experienced crocheter, these creative enhancements are a great way to express your individual style and make your hat uniquely yours.
Start with the basics-think about adding ribbons or fabric flowers. You can easily stitch a colorful ribbon around the brim to give it a playful flair. Alternatively, create some fabric or crochet flowers and sew them onto the side. This not only adds beauty but also dimension. For example, a sunflower in bright yellow can evoke summer vibes, while a small cluster of daisy-shaped crocheted pieces can add a whimsical touch. If you’re feeling adventurous, try layering different sizes of flowers for a more dynamic look.
Beads and Buttons
Incorporating beads or buttons can also provide a fresh spin on your summer hat. Consider stringing beads along the edges of the brim or within your crochet stitches for subtle sparkle. To attach buttons, choose a few that complement your yarn colors; sewing them in strategic places-like where the crown meets the brim-can break the monotony and provide a fun surprise to onlookers. Just remember: for a summer hat, lightweight materials like wood or plastic beads are ideal as they won’t weigh down your design.
- Decide on Theme: Choose a color scheme or theme for your embellishments that ties all elements together.
- Experiment: Don’t be afraid to play around with placement-sometimes the best designs come from spontaneous decisions!
- Secure Everything Properly: Make sure your embellishments are securely attached so they can withstand outdoor wear.
These little details not only reflect your creativity but also can transform a standard summer hat into something truly special. Remember, the sky is the limit-your hat should reflect who you are and what you love. Dive into your craft with joy, and don’t hesitate to try new ideas. With each stitch and embellishment, you’re creating a piece of art that you can wear proudly. You can do this!
Color Combinations and Patterns for Summer Vibes
Choosing the right colors and patterns for your crochet summer hat can transform it from a simple accessory into a vibrant expression of your personal style. It’s all about capturing those breezy vibes! To get started, think about the mood you want to convey. Bright, cheerful colors like sunny yellows, ocean blues, and fresh greens evoke warmth and playfulness, perfect for summer days. You can also explore softer pastels-think light pinks and mint greens-if you prefer a more understated look.
When selecting colors, consider using the color wheel as your guide. Complementary colors (those opposite each other on the wheel, like blue and orange) create dynamic contrasts that can really showcase your work. Alternatively, analogous colors (those next to each other, like blue, green, and teal) result in a more harmonious and soothing design. For a fresh take, you might mix vibrant solid colors with trendy ombre effects, where your chosen color transitions gradually from light to dark, adding depth and interest to your hat’s design.
Patterns also play a crucial role in achieving that summer aesthetic. Using open stitch designs, like shells or lace, not only gives your hat a light and airy feel, but it also showcases beautiful yarn colors. You can even incorporate stripes for a classic look- alternating between two or three colors can create a stunning visual effect. Don’t hesitate to experiment with different stitch combinations, as they can greatly enhance the overall texture of your hat. If you’re ready for a challenge, try adding a fun motif, such as flowers or seasonal shapes, to personalize your hat further and truly make it your own.
Here’s a quick tip: always swatch your chosen colors and patterns before diving into the full project. This not only ensures that you love the combination but also helps you visualize how they will look together. Remember, crafting is about having fun and exploring creativity-so don’t be afraid to try bold choices or mix unexpected colors. You can do this! Your finished hat will not only serve as a stylish accessory but also a joyful reminder of your crafting journey.
Using Different Styles: Sun Hats, Bucket Hats, and More
When it comes to crochet summer hats, exploring various styles can lead to an exciting array of creative possibilities. Each style offers its unique flair and functionality, perfect for those warm, sunny days. From wide-brimmed sun hats that provide ample shade to chic bucket hats that make a fashion statement, there’s something for everyone. Understanding how to craft these different designs will not only enhance your skill set but also allow you to express your personality through your crochet projects.
Sun Hats
Sun hats are a quintessential summer accessory, providing both style and sun protection. To make a simple sun hat, you can start with a basic pattern that allows you to create a wide brim. Choose lighter yarns, like cotton or a cotton-blend, for breathability and comfort. You could use a simple double crochet stitch throughout the body for a quick and effective design. Add a few rows of increases to build the brim, giving it more flair. Consider incorporating an open stitch pattern for added texture and a more relaxed look. Don’t forget to experiment with colorful yarns or add a contrasting band for a stylish touch.
Bucket Hats
Next up, bucket hats are trendy, versatile, and a fun project for all skill levels. These hats often feature a shorter brim and a structured body, maintaining their form while still being comfy. You can create a bucket hat by crocheting in the round, starting from the crown and working your way down. Use a tighter stitch, like half double crochet, for the body to hold its shape. For an extra pop, think about using variegated yarn or stripes. Bucket hats are perfect for lightweight cotton yarns, ensuring they remain breathable during those hot days. You can even personalize them with embroidery or fabric patches for a unique twist.
Fun Variations
Beyond sun hats and bucket hats, don’t shy away from trying other styles, like floppy hats or visors, which can also be made by adjusting the brim size and stitch patterns. Each of these styles allows for unique embellishments, such as flowers or ribbons, to elevate your hat’s look. Remember, the key is to have fun and tailor the style to fit your personal taste.
Whatever style you choose, each hat you create can reflect your creativity while providing essential sun protection. So grab your yarn, pick a pattern, and dive into these delightful projects-you can do this! Your crochet summer hat will not only serve as a stylish accessory but will also be a source of pride as you showcase your crafting skills.
Tips for Maintaining and Caring for Your Crochet Hats
Caring for your crochet hats is essential to keep them looking fresh and maintain their shape throughout the sunny days. Since most summer hats are crafted with lighter materials, like cotton, proper upkeep can extend their lifespan and preserve their vibrant colors. Here are some straightforward tips to help you care for your cherished crochet creations.
Start by understanding how to clean your hats effectively. Generally, hand-washing is the safest approach-fill a basin with cool water and add a gentle, yarn-friendly detergent. Gently press the hat down into the soapy water, avoiding any vigorous scrubbing that could deform your stitches. Rinse thoroughly with cool water until all soap is removed. If your hat has decorative elements, be cautious with them during cleaning to prevent damage.
Once cleaned, it’s important to dry your hat correctly. Instead of hanging it, which can stretch the fabric, lay it flat on a clean towel to dry. You can reshape the brim while it’s damp-simply pin the edges down gently to hold the desired shape as it dries. If your hat starts to lose its form over time, a little steam from a garment steamer can revitalize it. Just be careful not to hold the steamer too close to the fibers to prevent water spots.
To keep your hats safe from fading and wear, store them in a cool, dry place, away from direct sunlight when not in use. Consider using hat boxes or bins to protect them from dust. If you’re stacking the hats, place a soft cloth between them to avoid crushing any embellishments. Regular inspection is also key; check for loose threads or any signs of wear, and take the time to repair them promptly to maintain the overall integrity of your beloved summer accessory.
By incorporating these simple yet effective care techniques, your crochet hats can continue to turn heads and keep you stylish throughout many sunny seasons to come. Embrace the joy of making-and the pleasure of preserving your unique creations!
Inspiration Gallery: Creative Crochet Hat Ideas
If you’re looking for some delightful crochet hat inspiration for the sunny days ahead, you’ve come to the right place! The beauty of crafting summer hats lies in the variety of styles and designs you can explore, allowing you to express your creativity. Whether you’re a seasoned crocheter or just starting your journey, there are countless ideas to spark your imagination and elevate your summer wardrobe.
Chic Sun Hats
One of the most popular summer hat styles is the wide-brim sun hat. This functional piece not only protects you from the sun but also makes a bold fashion statement. To create a chic, floppy sun hat, try using lightweight cotton yarn for breathability. A solid color can be dressed up with a contrasting band or flower embellishments. For a more advanced touch, consider adding a built-in wire into the brim for adjustable shaping. Check out patterns that feature intricate lacework or fun color blocks to showcase your technique.
Fun Bucket Hats
Bucket hats are making a huge comeback and are perfect for a laid-back summer vibe. They’re easy to whip up in a single afternoon, and you can personalize them in so many ways! Use a mix of vibrant colors or stripes for a playful look. A great beginner-friendly project, these hats can be crocheted in rounds, and you can even use up leftover yarn from other projects. Don’t forget to add cute embellishments like patches or buttons to make it uniquely yours!
Creative Berets and Beanies
For cooler summer evenings or breezy beach walks, a lightweight crochet beret or beanie is a fantastic option. Use airy stitches to ensure comfort without overheating. You can play with textures by trying different crochet techniques, such as popcorn stitches for added depth and dimension. These hats can be dressed up with pom-poms or decorative flowers, making them versatile for both casual and more refined outfits.
As you explore these creative crochet hat ideas, remember that every project is a chance to learn and grow your skills. Don’t shy away from experimenting with different yarns, colors, and techniques. Each hat you create is not just a protective accessory but also a representation of your unique style and creativity. So grab your hooks and yarn, and let your imagination run wild-you’ve got this!
Sharing Your Crochet Success: Community and Resources
The thrill of completing your crochet summer hat is just the beginning! Sharing your creations can lead to endless inspiration and new friendships. Connecting with fellow crocheters not only enhances your craft but also provides support and encouragement for your projects. Whether you’re posting on social media, joining local groups, or participating in online forums, there’s a vibrant community ready to celebrate your successes and share tips along the way.
Engage with local craft groups, online forums like Ravelry, or Facebook crochet groups where members frequently share their projects, ideas, and advice. These platforms are fantastic for finding resources like free patterns for crochet hats that fit any skill level. Don’t hesitate to ask questions; the crochet community is known for being incredibly welcoming and eager to help! Sharing your experiences-whether you’re a newbie or an experienced crocheter-can spark delightful conversations and inspire others to try their hand at making hats.
For those looking to take their craft further, numerous resources are at your fingertips. Websites like Easy Crochet and LoveCrafts showcase a plethora of free crochet patterns, with easy navigation to find summer hat styles. You can explore tutorials that teach everything from basic stitches to advanced techniques, perfect for enhancing your crochet skills and maintaining your creative flow. Consider filming a short video of your own crochet process or hosting a virtual “yarn chat” with friends to share techniques and ideas, making your crafting routine both productive and enjoyable.
Lastly, don’t forget to celebrate your finished projects! Share photos of your stunning summer hats online using hashtags to connect with other hat makers around the globe. You might even find inspiration from others’ creations that you can adapt for your next project. Remember, each piece you create adds to your personal journey in crochet, and sharing those moments not only builds community but also enhances your enjoyment of this wonderful craft. So, gather your yarn, connect with friends, and let the sharing begin!
Frequently Asked Questions
Q: What yarn is best for a crochet summer hat?
A: The best yarn for a crochet summer hat is lightweight cotton or bamboo yarn. These materials are breathable and help keep you cool on warm days. Choose a DK or sport weight yarn for an ideal balance of durability and comfort, perfect for summer styles. Explore yarn options in the section on Choosing the Right Yarn for Your Crochet Summer Hat.
Q: How do I size a crochet summer hat for children?
A: To size a crochet summer hat for children, measure their head circumference and use a size chart to determine your starting chain length. Adjust the number of rounds based on their age. Refer to the Customizing Your Hat: Sizes and Fits for Everyone section for detailed guidance.
Q: Can I use a flower embellishment on a summer hat?
A: Yes, adding a flower embellishment can enhance the design of your summer hat. Use cotton yarn to crochet flowers in vibrant colors, then sew or attach them securely. Check out the Adding Fun Embellishments to Your Crochet Hats section for creative ideas.
Q: What are some easy crochet stitches for summer hats?
A: Easy crochet stitches for summer hats include the double crochet, half double crochet, and shell stitch. These stitches create an airy design, allowing for flexibility and breathability. Refer to the Top Crochet Stitches for Breezy Summer Designs for specific instructions to incorporate into your project.
Q: How can I care for my crochet summer hat?
A: To care for your crochet summer hat, hand wash it in cool water using gentle soap. Avoid wringing; instead, lay it flat to dry. This method helps maintain the hat’s shape and durability. For more tips, check the Tips for Maintaining and Caring for Your Crochet Hats section.
Q: What types of summer hats can I crochet?
A: You can crochet various types of summer hats, including sun hats, bucket hats, and visors. Each style offers unique sun protection while being fashionable. Look into the Using Different Styles: Sun Hats, Bucket Hats, and More section for inspiration and patterns.
Q: How long does it take to crochet a summer hat?
A: The time to crochet a summer hat varies by experience and pattern complexity, but it typically takes 2 to 5 hours for beginners. For more complex designs, it may take longer. Consider starting with simpler styles to boost your confidence. Check out the Step-by-Step Guide to Basic Hat Construction for accessible patterns.
Q: Can I customize the colors of my crochet summer hat?
A: Absolutely! Customizing colors is a fun way to express your style. Use light and bright colors to reflect summer vibes, and mix or match shades. For tips on color combinations, see the Color Combinations and Patterns for Summer Vibes section.
The Way Forward
Now that you have your fun and breezy crochet summer hat, you’re ready to enjoy sunny days in style! Remember, this pattern is perfect for all skill levels, so don’t hesitate to experiment with colors and yarn types. Feeling inspired? Browse our collection of easy crochet patterns to find matching accessories like lightweight scarves and tote bags, or check out our tips on caring for your crochet projects to keep them looking fresh all summer long.
If you have any questions or want to share your creations, drop a comment below-we’d love to see your unique styles! Don’t forget to sign up for our newsletter to stay updated on the latest crochet patterns and techniques. You’ve got this, and creating beautiful pieces like your summer hat is just the beginning of your crafting journey. Keep exploring, keep creating, and let the joy of crochet brighten your days!
Get our latest guides, news, and insights highlighted in your Google Search & AI Overviews.