
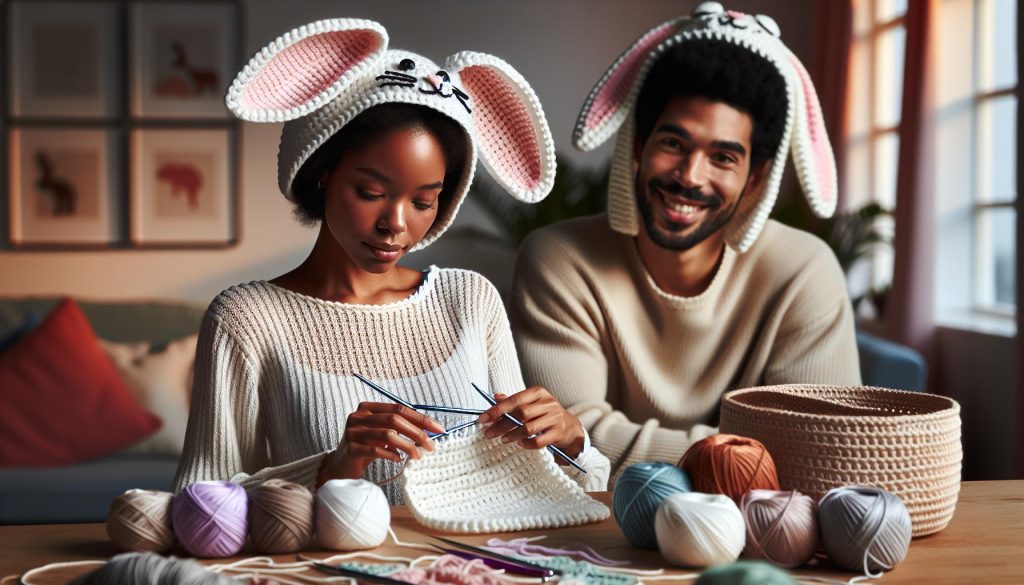
Creating a delightful crochet bunny hat is an exciting project that brings a touch of whimsy and creativity to any occasion, whether it’s for Easter festivities or a fun costume party. Did you know that making your own accessories can not only save money but also let you express your unique style? This adorable rabbit costume accessory is perfect for crafters at any skill level, offering a rewarding experience as you create something special for a loved one or even yourself.
In this guide, we’ll walk through the simple steps to crochet your very own bunny hat, ensuring you feel supported and confident throughout the process. Armed with basic materials and a little bit of time, you’ll be able to whip up this charming hat in no time. Plus, with variations for all ages-from newborns to kids-you can make matching hats for the whole family! Let’s dive in and uncover the joy of crafting this lovable accessory together!
How to Choose the Best Yarn for Your Bunny Hat
Choosing the right yarn for your bunny hat is crucial to ensure not only the hat’s adorable appearance but also its comfort and durability. Opt for soft, lightweight yarns like acrylic or cotton blends. These materials are gentle against the skin, making them perfect for little ones who will wear the bunny hat. A medium weight yarn (worsted weight) will work wonders, as it gives your project enough body without being overly bulky.
When selecting yarn colors, consider your creative vision: pastel shades can create a charming, classic bunny look, while bright colors can add a fun twist. You might also want to explore variegated yarn, which provides interesting visual effects and can elevate even the simplest designs. Before you purchase, it’s helpful to check the label for recommendations on washing and care, especially if this hat will be worn frequently or gifted.
Finally, think about yarn yardage. For a standard bunny hat, you’ll typically need around 150 to 200 yards, depending on the size and design. Always buy a little extra to account for any unexpected mistakes or adjustments. With the right yarn in hand, you’ll be well on your way to crafting a delightful bunny hat that everyone will adore! Remember, each stitch brings you closer to your creation, so enjoy the process!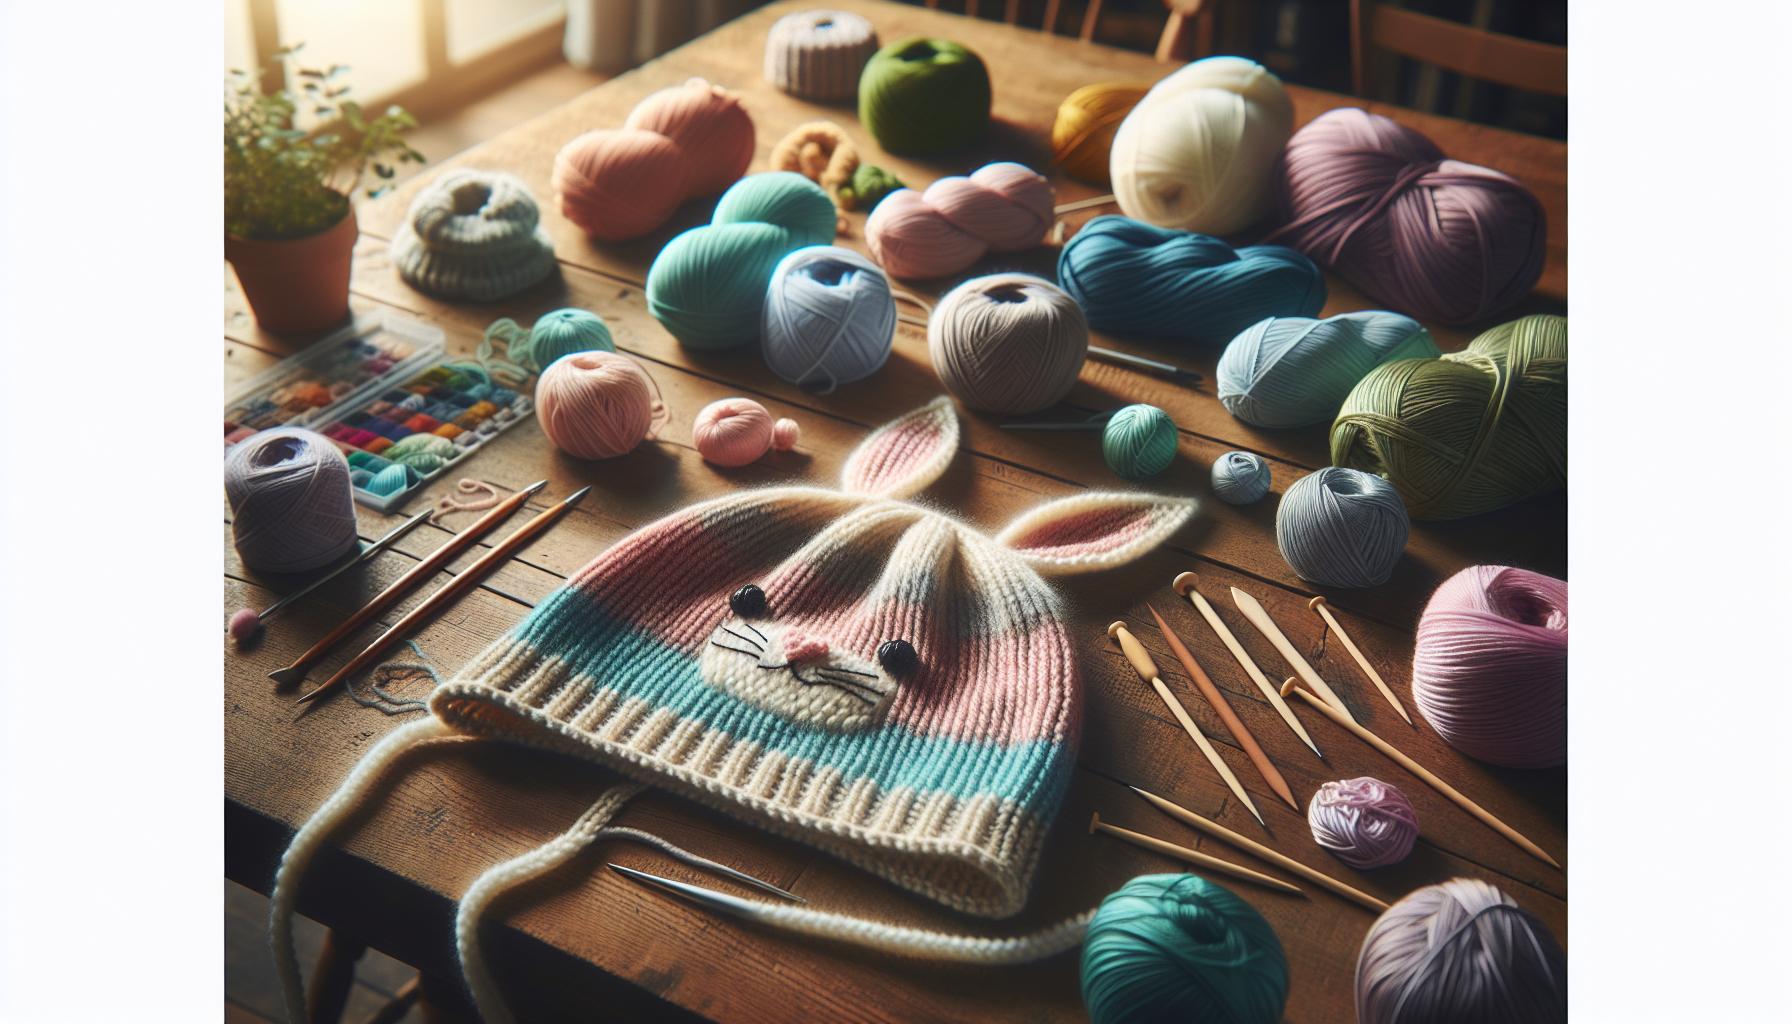
Essential Crochet Tools and Materials for Beginners
To embark on your journey of crocheting an adorable bunny hat, having the right tools and materials is essential for a smooth and enjoyable crafting experience. Luckily, you don’t need a truckload of supplies to start-just a few basics will do wonders. Here’s what you’ll need to get going, whether you’re a newbie looking to dive into crochet or a seasoned crafter seeking a fun project.
First and foremost, you’ll want to gather your yarn. As mentioned earlier, opt for soft, lightweight materials like acrylic or cotton blends. These yarns are not only comfortable against the skin but also easy to work with. The standard medium weight (worsted) works perfectly for a bunny hat, giving you that desired structure without being overwhelming. It’s wise to pick a skein that matches your vision-think soft pastels for a classic look or vibrant shades for something more whimsical.
Next up are the hooks. A size H (5.0 mm) crochet hook is a great starting point for most worsted-weight yarns. This size strikes a nice balance, allowing you to create tightly woven stitches while still being manageable for beginners. Don’t forget about stitch markers; they can help you keep track of your rounds, especially when crocheting the body of the hat. You might also consider a tapestry needle for weaving in ends and securing your work, ensuring it looks polished and professional.
Here’s a convenient list of essential tools and materials:
- Yarn: Medium weight acrylic or cotton blend (150-200 yards)
- Crochet Hook: Size H (5.0 mm)
- Stitch Markers: To track rounds
- Tapestry Needle: For weaving in ends
- Scissors: For cutting yarn
With your tools and materials at the ready, you’ll find crocheting your bunny hat to be not only achievable but also a delightful creative outlet. If you’re ever unsure, don’t hesitate to refer back to online tutorials or crafting communities for inspiration and support. Remember, the joy is in the making, so soak up every moment as you create something charming and unique! You can do this!
Step-by-Step Instructions to Crochet the Bunny Ears
To create those charming bunny ears that will bring your crochet hat to life, we’ll break down the process into simple, achievable steps. Don’t worry if you’re new to crocheting; these ears are perfect for all skill levels and can add a delightful touch to your completed bunny hat. You can expect to spend about an hour crafting the ears, depending on your comfort level with crochet. So, ready your hook and let’s hop into it!
Start with your medium weight yarn and a size H (5.0 mm) crochet hook. This size strikes a good balance, making it easy to work with and ensuring your stitches won’t be too tight or too loose. Here’s how to get started with your bunny ears:
- Magic Ring: Begin by creating a magic ring. This technique helps to create a closed circle that serves as the foundation for your bunny ears.
- Round 1: Chain 2 (this doesn’t count as a stitch). In the magic ring, crochet 12 double crochet stitches (dc). Pull the magic ring tight to close any gaps at the center.
- Round 2: Chain 2, and then in the same stitch, make 2 dc. Continue to place 2 dc in each stitch around for a total of 24 stitches. This adds some width to your ears.
- Round 3: Chain 2 again, then 1 dc in the next stitch, 2 dc in the following stitch. Repeat this pattern around. You’ll finish this round with 36 stitches. This helps to create the distinct pointed shape of the ears.
- Rounds 4-6: For the next three rounds, simply chain 2 and crochet 1 dc in each stitch around (for a total of 3 rounds). This will give your ears a solid length.
- Finishing: To close off, slip stitch into the next stitch and fasten off, leaving a long tail for sewing. Your ears will now be ready to attach to your hat!
Once you’ve created two identical ears, it’s time to attach them to your bunny hat. Position them symmetrically at the top of your hat and sew them securely using your tapestry needle. You can even bend them forward for that classic floppy look!
This project is a wonderful way to practice your crochet stitches while creating something adorable. Remember: you can do this! Embrace the process, and soon enough, you’ll have a delightful bunny hat that’s perfect for any costume or playful occasion. Happy crocheting!
Tips for Mastering Basic Crochet Stitches
To tackle the basic stitches needed for your bunny hat, it’s essential to cultivate a solid foundation in crochet skills. Mastering these stitches not only enhances your confidence but also makes the crafting process more enjoyable. You can do this, and with practice, you’ll find that what once seemed challenging becomes second nature! Here are some tips to help you along the way.
Start with the Basics: Begin your crocheting journey with the foundational stitches: chain stitch, single crochet, and double crochet. These are the building blocks for creating your bunny hat and many other projects. Practice these stitches on a small swatch of yarn before diving into the hat itself. This will help you gain a feel for tension and gauge-important aspects of any crochet project.
Use a Comfortable Grip
Pay attention to how you hold your hook and yarn. Finding a grip that feels comfortable can drastically affect your speed and accuracy. If your hands start to cramp, take a break! You want the process to be enjoyable, so don’t hesitate to adjust your positioning until you find what works best for you.
Practice Makes Perfect
Crochet is much like playing an instrument; the more you practice, the better you become. Set aside a little time each day to work on your crochet skills. Whether it’s perfecting your double crochet stitch or getting used to changing yarn colors, consistent practice leads to progress. You’ll be amazed at how quickly you improve!
Stay Relaxed and Enjoy the Process
Keep your body relaxed as you work. Tension can lead to tight stitches, making it harder to get your hook through. If you feel yourself tensing up, take a deep breath and shake out your hands. Remember, it’s all about enjoying your creative journey. If you encounter mistakes (and you will!), see them as an opportunity to learn rather than a setback.
Ultimately, the key to mastering crochet stitches lies in patience and practice. As you create your bunny hat, embrace each stitch and celebrate your progress. You’ve got this, and soon you’ll be wearing a delightful hat showcasing your crochet skills! Happy crafting!
Adding Personality: Customizing Your Bunny Hat
Creating a unique bunny hat allows you to express your personal style and creativity. Whether it’s for a special occasion, a costume party, or just for fun, customizing your hat can make it truly one-of-a-kind. The best part? It’s easier than you might think! With a few simple tweaks, you can add charm and character that reflect your personality or the preferences of the lucky wearer.
To start, consider the yarn and colors you choose. Using a base color that resonates with your vision is essential. Think about incorporating two or more colors for a playful look or choose a soft pastel palette for a more whimsical vibe. You can even use a variegated yarn for an effortless blended effect. Each of these choices brings different personality traits to the project, whether you want it to feel vibrant and lively or ultra-soft and cozy.
Adding embellishments is another fantastic way to personalize your bunny hat. You might sew on cute buttons or felt shapes as eyes, add a pom-pom for a nose, or crochet small accessories like a bowtie or flower to attach to the hat. Consider incorporating textures such as fluffy yarns for the ears to create a more huggable design. Each accessory you add not only enhances the visual appeal but also brings a touch of handmade love, making your creation memorable.
Finally, don’t shy away from experimentation! Each stitch and color choice is a step towards a masterpiece that reflects who you are. Remember, there’s no “right” way to customize your hat. If you have kids, involve them in the design process; their ideas can spark unique concepts you might not have considered. Ultimately, the joy lies in the journey of making something special-so grab your hooks and let that creativity flow! You can do this!
Finishing Touches: Securing and Weaving in Ends
After all the hard work you’ve put into crocheting your adorable bunny hat, it’s time for the satisfying finishing touches! Securing and weaving in ends not only tidies up your project but also ensures that your creation is durable and ready for all the fun it will bring. Trust me, taking these extra steps can make a significant difference in the final look and longevity of your hat.
To start, make sure you have a pair of scissors and a yarn needle handy. Once you’ve completed your last stitch, don’t rush to cut your yarn just yet! Leave a tail of about 6 inches, then cut the yarn. Thread the yarn tail through your yarn needle. Now, gently pull the last few stitches tight to ensure they’re snug, then push the needle through the top of a few stitches in the hat. This will help secure everything neatly in place. Be sure to weave the yarn in different directions, moving both horizontally and vertically, to create extra security.
When it comes to the yarn ends from your bunny ears or any embellishments, follow the same technique. Tuck those tails neatly into the work to prevent any fraying or unraveling. This is especially important for whimsical hats that may see a lot of movement from little ones wearing them! Remember, you could take the extra step to trim the ends to about an inch once woven in, but be sure not to cut too close, or you risk having them poke out later.
Finally, once all your ends are tucked securely, give your bunny hat a final check. Run your fingers over the seams, and ensure everything feels smooth. This is a great moment to appreciate your finished product! Your effort in securing ends will pay off next time someone admires your creation-or asks for one of their own. You’ve done an incredible job, and rest assured, this hat is ready for its moment in the spotlight!
Exploring Color and Style Variations for Your Hat
The beauty of crocheting a bunny hat lies not just in its adorable design but also in the endless possibilities to personalize it through colors and styles. Whether you want a classic look or something more whimsical, the choice is yours-and it’s easier than you might think!
Start by selecting your color scheme. You can opt for traditional pastel colors like soft pinks, blues, and yellows for an Easter-themed bunny hat, or go bold with bright hues like hot pink or neon green for a fun twist. For a more muted, cozy feel, consider earthy tones like taupe or sage green. Tip: Using a combination of tonal shades can create a charming ombre effect. Also, don’t hesitate to use variegated yarn that shifts colors as you crochet, adding a unique flair to your hat!
Style Variations
Beyond color, you can experiment with styles to make your bunny hat stand out. Here are some creative options to consider:
- Ear Length: Try making the bunny ears longer or shorter based on your preference. Longer ears can flop attractively, while shorter ones can give a cute, cartoonish look.
- Hat Shape: Instead of a standard beanie shape, you could create a nubby or slouchy style for a trendy vibe.
- Textured Stitches: Utilize different crochet stitches, such as popcorn or shell stitches, on the main body of the hat for added texture. This can make your hat visually interesting and fun to touch!
- Embellishments: Think beyond the ears! Adding a pom-pom at the top or embellishing the base with a cute bow or flowers can truly elevate your creation.
Bringing It All Together
As you choose colors and design elements, keep in mind the overall occasion for the hat-be it a holiday gathering, a fancy dress party, or simply a playful day out. By blending your yarn selection with creative style choices, you can craft a bunny hat that not only showcases your crochet skills but also reflects your personal style. Remember, the key is to have fun and enjoy the process! Each hat you make is a step in your crafting journey, so embrace your creativity and let your imagination run wild. You can do this!
Incorporating Accessories: Bowties, Flowers, and More
Adding unique accessories to your bunny hat not only enhances its charm but also gives you a chance to express your creativity! Accessories like bowties, flowers, and even whimsical elements can transform a simple hat into a standout piece. Plus, they are fun to make and easy to incorporate into your project.
Start with the basics-you can easily crochet a bowtie to attach to the front or side of your hat. To create a simple bowtie, you’ll need a few stitches and a small amount of yarn. Here’s a quick overview:
- Materials: Yarn in the color of your choice, matching crochet hook, fastenings (like a hairpin or brooch, if desired).
- Steps:
- Chain a length that forms the center of your bow.
- Create the bow’s shape by working into the chain to form solid and double crochet stitches.
- Pinch the center and tie off with a contrasting piece of yarn to secure the bow’s shape.
Flowers are another delightful option. Crochet flowers add an adorable touch and can be crafted in various sizes. You can use a simple pattern to create flowers that can be sewn or clipped onto the hat. Start by choosing a flower pattern that suits your style. Here’s a basic approach for a crochet flower:
- Materials: Yarn in vibrant colors, crochet hook, and a yarn needle.
- Steps:
- Start with a magic ring and chain to form the base.
- Work into the ring to create petals, using double crochet and slip stitches for texture.
- Secure the flower with a yarn needle, weaving in any loose ends.
Finally, don’t shy away from mixing materials! Consider using felt or sewn fabric for different accessories. A felt carrot or bunny tail can be a cute addition to your hat, making it perfect for Easter or a themed party. The key here is to let your imagination take flight-combine textures, shapes, and colors that speak to you!
Remember, this is all about having fun and exploring your creativity. Whether you’re new to crochet or an experienced maker, these accessories are a wonderful way to put your personal stamp on your bunny hat. You can do this!
Troubleshooting Common Crochet Mistakes
Crocheting your own bunny hat can be a delightful experience, but like any craft, it comes with its fair share of bumps along the way. Whether it’s miscounting stitches or ending up with an uneven shape, it’s all part of the learning journey. The good news is that most mistakes can be easily identified and fixed, allowing you to keep crafting with confidence. Here’s a straightforward guide to help you troubleshoot common issues you might encounter while creating your adorable rabbit hat.
One frequent challenge is tension. If your stitches are too tight, your hat might end up too small, while loose stitches can cause the fabric to sag. To check your tension, make a small swatch before starting your project. If you find your stitches are too tight, try using a larger hook or consciously easing up while working. Conversely, if your stitches are too loose, consider switching to a smaller hook and pay attention to your grip on the yarn as you crochet.
Another common hiccup is miscounting stitches, leading to uneven shapes in your ears or hat body. This can happen to the best of us! A helpful solution is to mark your rounds using stitch markers. Place a marker at the beginning of each round or on the last stitch of each row; this will help you ensure accuracy as you progress. If you discover an error, unraveling the stitches back to where you went wrong is usually the best path forward. Just remember, it’s okay to pull out stitches-this is part of the crafting experience!
Sometimes, you may notice gaps or holes in your work, particularly where you’ve joined new yarn or made increases. To avoid this, always ensure that you’re making your stitches tightly and that you’re not skipping any spaces. If gaps do appear, you can easily sew them up using a yarn needle and a bit of the same yarn. For a more seamless look, try to crochet tightly around those areas as you continue, pulling the yarn snugly without altering the overall tension of your project.
Remember, every maker encounters these issues at some point, and the key is to remain patient and persistent. With each project, you build your skills and gain confidence. Embrace the learning process, and don’t hesitate to experiment as you create your bunny hat-it’s all part of the fun! You can do this!
Showcase: Real Bunny Hat Projects from Crafters
As you embark on your journey to create a charming bunny hat, it’s uplifting to see the creativity and personal touches that crafters bring to their projects. From whimsical color choices to unique embellishments, the showcase of real bunny hat projects reveals just how far a simple pattern can take you. These creations not only demonstrate skill but also embody the joy and satisfaction of crafting.
One inspiring example is a vibrant pastel crochet bunny hat featuring oversized floppy ears, made by a beginner who was thrilled to gift it for a friend’s baby shower. Using a soft acrylic yarn allowed the hat to be both cozy and washable-a crucial consideration for baby accessories. The addition of a cute little pink bowtie on one ear transformed it into a delightful accessory that everyone admired. If you’re looking to customize your own, think about using contrasting colors or even adding buttons or fabric flowers to make your hat truly special!
Another wonderful project comes from a seasoned crocheter who opted for a more rustic feel, using a chunky wool blend in earthy tones. This hat combined practicality and aesthetics, making it perfect for chilly Easter egg hunts. With a strategic use of textured stitches, this crafter added depth to the pattern, proving that even those new to crochet can experiment with texture. Take inspiration from this and don’t be afraid to mix yarn types or thicknesses; you might just create a standout piece.
Finally, don’t underestimate the power of community! Many crafters share their projects on social media or craft forums, inspiring one another and exchanging tips. Look up hashtags like #BunnyHat or #CrochetProjects to find a wealth of inspirations and support from fellow makers. You’re part of a vibrant community that celebrates creativity, and sharing your own project could spark the next great idea. Remember, your bunny hat project is not just a pattern-it’s an opportunity to express your style and creativity. You can do this!
How to Care for and Maintain Your Crochet Items
Taking care of your crochet creations, like that adorable bunny hat, is just as important as making them. With the right care, your handmade items can stay vibrant and cozy for years to come. Caring for your crochet items doesn’t have to be complicated-it’s about being mindful of materials and choosing the right cleaning techniques.
Start with understanding the yarn you’ve used. If your bunny hat is made from acrylic yarn, it’s generally easy to wash. Simply toss it in the machine inside a mesh laundry bag, using a gentle cycle with cold water. For natural fibers like wool or cotton, hand washing is often the best approach to prevent shrinking or stretching. Fill a basin with cool water and a mild detergent, gently submerging the item for about 10-15 minutes. Rinse with cool water until all soap is out, being careful not to wring or twist the hat. Instead, lay it flat on a clean towel and roll it up to absorb excess moisture.
Storing Your Crochet Bunny Hat
When it comes to storing your bunny hat, keep it in a cool, dry place away from direct sunlight, which can fade colors over time. A breathable cotton bag is a perfect choice to prevent dust buildup while still allowing airflow. Avoid folding it; instead, store it flat to maintain its shape. If it features delicate embellishments, be especially careful to avoid crushing them.
Finally, inspect your creations regularly for any signs of wear and tear. Should you find loose threads or unravelling stitches, don’t be shy about stitching them back up. This simple preventative care can significantly extend the life of your favorite crochet projects. Remember, the joy of crafting doesn’t end when the project is complete-it’s also about cherishing and maintaining your handiwork. You’ve put in the love and effort to create something beautiful, so let’s make sure it lasts!
Where to Share Your Finished Bunny Hat Creations
After investing your time and creativity into crafting a delightful bunny hat, the next exciting step is to share it with the world! Sharing your finished projects is not only a way to showcase your handiwork but also an opportunity to connect with other crafters and inspire those around you. There are plenty of platforms where you can display your adorable creations and receive encouragement from a vibrant community of makers.
Social media platforms like Instagram, Facebook, and Pinterest are fantastic places to share photos of your bunny hat. You can use specific hashtags like #CrochetBunnyHat or #HandmadeWithLove to draw attention from fellow enthusiasts. Many users love to see new ideas and designs, so don’t hesitate to post multiple angles or close-ups of any special features! Consider joining crochet-specific groups on Facebook or following crochet hashtags on Instagram, where you can interact with others who share your passion.
Online forums and crafting communities, such as Ravelry or Reddit’s crochet threads, are also excellent for sharing your work. These spaces allow for deeper discussions and feedback on your projects. You might find someone who shares your color choices or offers tips on your next project. Don’t forget to add details about your techniques or pattern adaptations in your posts! You may inspire someone else to try their hand at crochet or even replicate your design.
Lastly, local crafting groups or workshops are a wonderful venue to share your crochet projects. Bringing your work to a fabric store, craft fair, or community center can lead to fulfilling conversations with other locals who enjoy similar hobbies. Showing your bunny hat in person can foster connections and result in fun collaborations or new friendships! Remember, sharing your creations not only celebrates your hard work but also thrives on the support of a community that appreciates the art of crafting. So snap those photos, share your story, and bask in the joy of your creativity!
Frequently Asked Questions
Q: What size yarn is best for crocheting a bunny hat?
A: The best yarn for crocheting a bunny hat is typically a medium-weight yarn (worsted weight) or a soft acrylic blend. This thickness provides warmth and structure for the hat while being easy to work with for beginners. Choose light colors for a cute, Easter-themed look.
Q: How long does it take to crochet a bunny hat?
A: It usually takes about 2 to 4 hours to crochet a bunny hat, depending on your skill level and the pattern complexity. Beginners may take longer, so don’t rush; enjoy the crafting process!
Q: Can I crochet a bunny hat without making the ears?
A: Yes, you can crochet a bunny hat without ears. Simply follow a basic beanie pattern, skipping the ear sections. This creates a cute hat that’s versatile for everyday wear or festive occasions.
Q: What is the best hook size for crocheting a bunny hat?
A: A 5.0 mm (H/8) crochet hook is recommended for worsted weight yarn, which is commonly used in bunny hat patterns. Always check your pattern for specific hook size recommendations.
Q: Are there any special techniques for making bunny ears?
A: Yes, when crocheting bunny ears, consider using a combination of double crochet and slip stitches for a fluffy look. Adding a contrast color at the ear tips can also enhance their cuteness. Check your pattern for specific techniques.
Q: How do I wash and care for my crocheted bunny hat?
A: To care for your crocheted bunny hat, hand wash it in cool water with mild detergent, then reshape it and lay it flat to dry. Avoid stretching or wringing to maintain its shape.
Q: Can I customize my crochet bunny hat with decorations?
A: Absolutely! You can customize your crochet bunny hat with embellishments like ribbons, flowers, or buttons. Adding personalized touches can make it unique and festive, perfect for an adorable rabbit costume accessory.
Q: What are some common mistakes to avoid when crocheting a bunny hat?
A: Common mistakes include inconsistent tension and not checking gauge. Always take your time to measure yarn and stitches, and follow pattern instructions closely for the best results. If you encounter issues, refer back to the troubleshooting section in your article for tips.
In Retrospect
And that’s it! You’ve successfully crafted an adorable bunny hat that’s perfect for any costume occasion. If you loved this project, why not share your finished creations in the comments below? We’d love to see your unique takes, and don’t forget to tag your friends who would enjoy crocheting this too!
For more exciting crochet projects, check out our tutorials on “Easy Crochet Accessories” and “Creating Cute Animal Hats.” They’ll keep your crafting journey going strong. And remember, if you’re eager to improve your crochet skills even further, sign up for our newsletter for exclusive tips and insights.
Happy crocheting! You can totally do this, and every stitch brings you closer to becoming a pro. Don’t stop now-keep exploring and creating!
Get our latest guides, news, and insights highlighted in your Google Search & AI Overviews.