
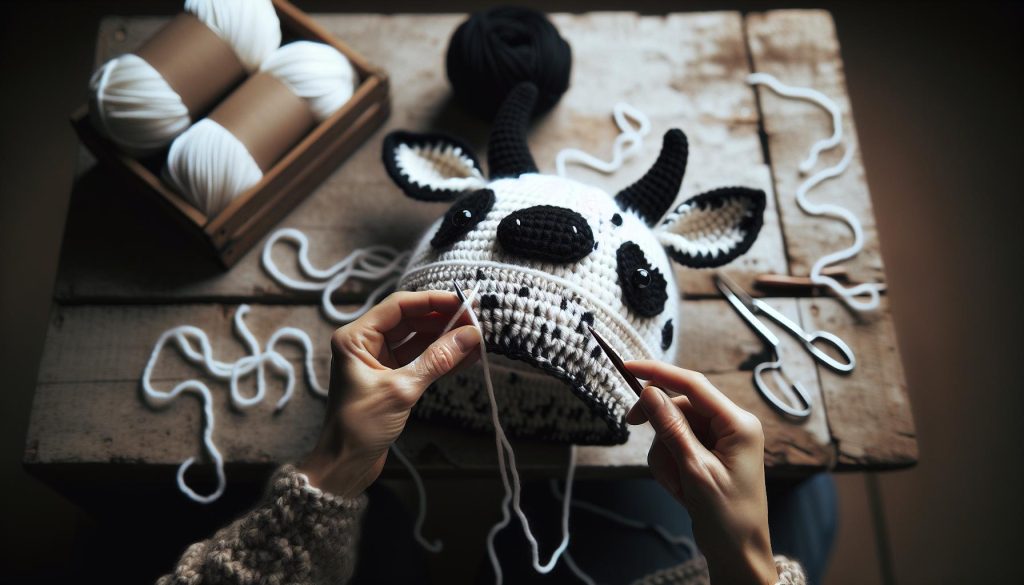
Have you ever wanted to create an adorable, cozy cow hat that will bring smiles wherever you go? In this guide, we’ll walk you through making a charming crochet cow hat complete with black and white spots and cute ears. Perfect for beginners and experienced crafters alike, this fun project is not only a great way to hone your skills but also a fantastic gift for friends and family-or even a treat for yourself! We’ll provide you with step-by-step instructions, a list of materials, and helpful tips to ensure your crafting experience is enjoyable and straightforward. So grab your yarn and hook, and let’s bring this delightful hat to life, one stitch at a time. You’ve got this!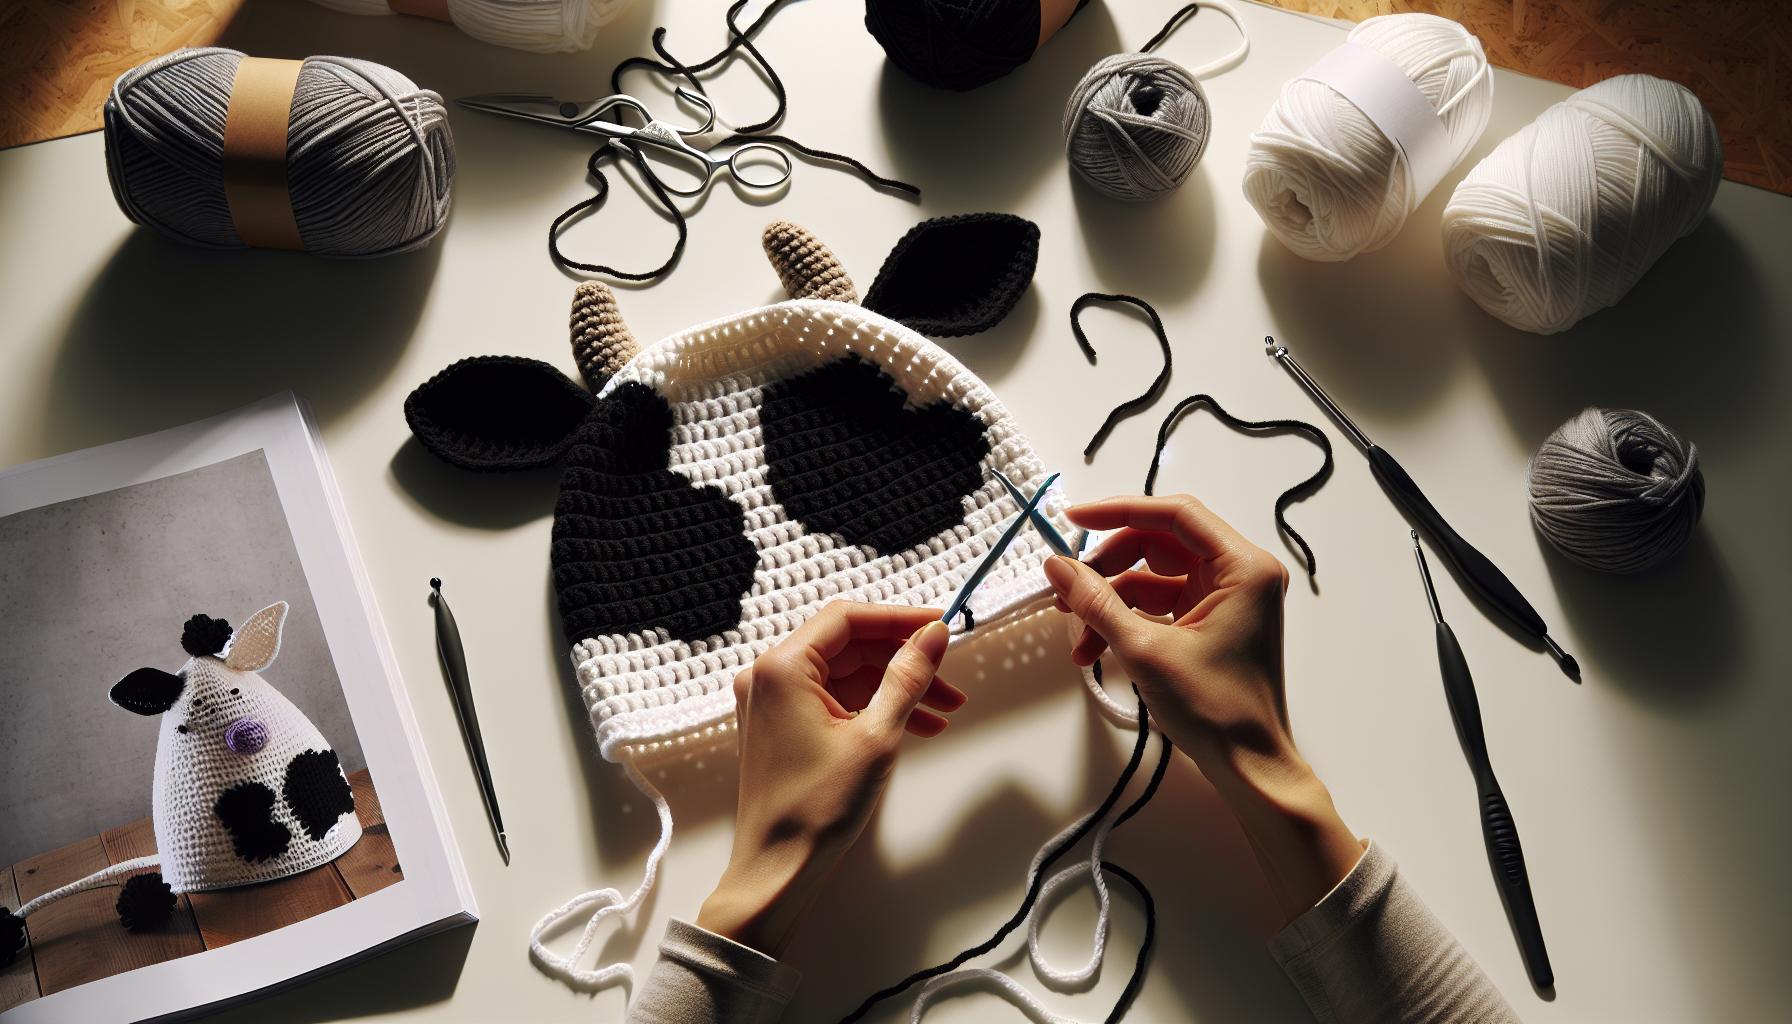
Choosing the Right Yarn for Your Cow Hat Project
can make all the difference in how your finished piece turns out. With the playful nature of this hat, selecting fibers that enhance both its appearance and comfort is essential. For a cozy hat that fits snugly and retains shape, consider using medium-weight yarn, such as worsted weight (size 4) or even bulky yarn (size 5) if you prefer a plushier feel. The thickness will contribute to the hat’s warmth, making it a fun accessory for chilly days.
When choosing colors, you’ll likely want to stick to classic black and white for that adorable cow look. Look for yarns labeled as acrylic or a blend that includes wool; acrylic is affordable and widely available, while wool adds warmth and breathability. Here are some yarn options to consider:
- Scheepjes Catona: Great for color definition, perfect for your black and white spots.
- Bernat Super Value: A sturdy, budget-friendly option, ideal for beginners.
- Red Heart Soft: Soft, durable, and perfect for those who want a gentle touch against their skin.
Before you begin, check your yarn’s gauge, as this will ensure that the finished hat fits as desired. Yarns often come with recommended hook sizes and gauge information-using a gauge swatch can save you time and frustration later! Keep in mind that the easier it is to work with the fiber, the more enjoyable your crocheting experience will be. Don’t hesitate to touch and feel the yarn at your local craft store to find a texture that makes you excited to craft your cow hat. You can do this-your cute, cozy cow hat is just a few stitches away!
Essential Crochet Tools for Beginners
Starting your crochet journey can be incredibly fulfilling, especially when you’re crafting something as fun as a cow hat with adorable ears and spots! To ensure your experience is smooth and enjoyable, having the right tools at your fingertips is crucial. Whether you’re a total beginner or merely brushing up on your skills, assembling these essential crochet tools will help you bring your cow hat vision to life.
First, you’ll need a good set of crochet hooks. For a project like this, a 5.0mm (H) or a 6.0mm (J) hook usually works best, especially with medium-weight yarn. These sizes will help create a sturdy structure while maintaining a cozy stretch. If you’re unsure which size to pick, it can be helpful to have a range of hooks at hand; as you gain confidence, you might experiment with different sizes to see how they affect your stitch tightness and overall texture.
Next, don’t overlook the importance of a yarn needle. This handy tool is essential for weaving in ends and attaching your cow ears to the hat. Choose a needle with a large eye to accommodate your yarn of choice, especially if you’re using thicker strands. A pair of scissors is also a must-have; having sharp, rounded-tip scissors makes snipping yarn ends a breeze and keeps your project neat.
Lastly, consider investing in stitch markers. They are incredibly helpful for keeping track of your rows or marking specific stitches, especially as you’re working through the base of your cow hat and figuring out the placement for those cute spots. A measuring tape can also come in handy for adjusting your size as you go along. Remember, the journey of crafting is as rewarding as the finished product-so gather your tools, and let’s get crocheting! You’ve got this!
Step-by-Step Guide: Basic Crochet Techniques
There’s something incredibly satisfying about creating your own crochet projects, especially when they’re as whimsical as a cow hat! Embracing basic crochet techniques is your foundation for crafting this delightful accessory. With just a little practice, you’ll build the skills to transform simple yarn into a charming hat complete with spots and ears. Let’s dive into the essential techniques that will empower you on this creative journey.
To start with, mastering the chain stitch (ch) is crucial, as it forms the base of many crochet projects. To create a chain, simply make a slip knot on your hook, then yarn over (YO) and pull through the loop on your hook. Repeat this to make the desired length of your foundation chain. For most hat projects, you’ll want to start with about 60 to 80 chains, depending on the desired size. Once you feel comfortable with chains, practice the slip stitch (sl st) and single crochet (sc), which will help you create the body of your cow hat.
Next, when you reach the end of your chain, you will turn your work and begin crocheting into the second chain from the hook. Insert your hook into the stitch, yarn over, pull through, yarn over again, and pull through both loops on your hook. This is a single crochet stitch, and it’s the building block of solid fabrics-perfect for your hat! As you progress, you’ll soon incorporate half double crochet (hdc) and double crochet (dc) stitches to add texture and height to your hat.
Practice Makes Perfect
As you work on your cow hat, don’t hesitate to rip out stitches if something doesn’t look quite right. Crocheting is all about making adjustments, and every loop is an opportunity to learn. Aim for consistent tension; keeping your stitches even will make your hat look polished and professional. You might find it helpful to occasionally count your stitches or use markers to track your progress, especially after a few rows.
Lastly, remember that crochet is as much about enjoying the process as it is about the final product. While you’ll encounter challenges, each stitch brings you closer to a cozy cow hat that you can proudly wear or gift. Celebrate every milestone, no matter how small! You’ve got this-so grab your hook, and let’s get crocheting!
Creating the Base of Your Cow Hat
The foundation of your adorable cow hat starts with creating a solid base, and this process can be both fun and straightforward! You’ll set the stage for your whimsical design using basic crochet techniques that form the backbone of not just a cow hat, but many of your future projects. Gather your materials – medium weight yarn in white, black, and any other colors you want for personalization, along with your trusty crochet hook (usually a size H/8 or I/9 works well for this). This project is beginner-friendly and should take about 2-4 hours to complete depending on your speed.
Begin by making a foundation chain. Aim for about 60 to 80 chains, adjusting for the size of the hat you plan to make. This number is generally a good starting point for fitting an average adult head. Don’t worry if it feels daunting; just take it one stitch at a time. Remember to keep your tension even, which helps ensure a neat appearance. Here’s how to do it:
- Make a slip knot on your hook.
- Yarn over and pull through the loop on your hook; repeat until you reach your desired chain length.
Once your chain is complete, you’ll start the body of your hat by working into the second chain from the hook. This is where the magic begins! Insert your hook into that stitch, yarn over, pull through, then yarn over again and pull through both loops. Congratulations, you’ve just made your first single crochet stitch! Continue this for every chain until you reach the end of the line. This technique creates a solid base, perfect for building the rest of your cow hat.
After completing your foundation row, turn your work and chain one. Then you’ll begin your next row by repeating the single crochet in the first stitch and continuing across. Each row should link neatly back to the last, resulting in a beautiful fabric. Don’t hesitate to switch up the stitch styles as you go! Incorporating half double crochet (hdc) and even double crochet (dc) can add texture and height to your pattern, making your hat more visually interesting.
As you build your rows, keep trying on the hat to check the fit and adjust your sizing if necessary. The best part about crocheting is that you have the power to make changes as you go. Remember, you’re not just creating a hat – you’re crafting a whimsical piece that will surely bring smiles. Keep going; your cow hat base is just the start of a fantastic project, and you can do this!
Adding Black and White Spots: Techniques and Tips
To transform your cow hat into an adorable, whimsical masterpiece, adding those classic black and white spots is key. Not only do they enhance the hat’s character, but they also make it stand out as a playful piece of wearable art. The great news is that incorporating these spots can be simple, fun, and suitable for all skill levels. You’ll need to gather your supplies, which primarily include your medium weight yarn in black and white, a crochet hook, and your completed hat base.
When you’re ready to add the spots, consider your design placement first. Think of a cow’s unique pattern-these spots are often irregular and asymmetrical. You might want to sketch your ideas beforehand or simply trust your instincts as you go.
Creating the Spots
Here are a couple of popular techniques for adding those charming spots:
- Surface Slip Stitch: With the black yarn, simply insert your hook into a stitch on your hat. Yarn over and pull through, then yarn over again and pull through both loops. This technique allows you to create small, defined spots anywhere on your hat.
- Small Patches: Alternatively, you can crochet small circles separately and sew them onto your hat. To do this, create a magic ring, then crochet about 6-8 single crochet stitches into the ring. Pull tight, and you’ve got a cute little spot!
Adding these spots should take less than an hour, depending on how many you choose to include. For instance, you might opt for three to five larger ones or a scattering of smaller spots for a playful effect.
Tips for a Balanced Look
While you can place the spots anywhere, aim for balance. Avoid clustering all your spots on one side; instead, distribute them evenly for a harmonious design. Also, don’t worry about making them perfect-each spot should feel like a unique character on its own.
After you’ve placed your spots, step back and admire your work! You’re on your way to completing a fantastic cow hat filled with creative flair. Just remember, as you experiment and play with patterns, you’re embracing the joy of crafting. You can absolutely do this!
Crocheting the Cow Ears: A Detailed Walkthrough
Crafting the ears for your cow hat is where the magic truly happens! These adorable features bring your hat to life, making it not only fun to wear but also a delightful addition to any outfit. Don’t worry if you’re new to crochet; making cow ears is a straightforward process that will boost your confidence and skill level. Let’s dive into the steps together!
To get started, gather your materials. You’ll need medium weight yarn in black and white (or another color if you prefer) and a suitable crochet hook. Typically, a 4.0 mm (G) hook works well, but match the hook size to your yarn brand’s recommendation. Budget about 30 minutes to an hour for this project, depending on your experience level.
Step-by-Step Guide to Crocheting Cow Ears
- Make the Base: Begin with a magic ring. This will be the foundation for your ear.
– Chain 2.
– Crochet 6 single crochet (sc) into the magic ring.
– Pull the loop tight and join with a slip stitch to the first sc.
- Build Out the Ear Shape: For the next round, you’ll want to increase the size slightly.
– Chain 1 and then do 2 sc in each stitch around (12 stitches total).
– Join your round with a slip stitch again.
- Creating the Ears’ Height: In the following rounds, you’ll work in a pattern to create the classic ear shape.
– Round 3: Chain 1, sc in the first stitch, then 2 sc in the next. Repeat this around (18 stitches total).
– Rounds 4-5: Chain 1, sc around for these two rounds without increasing (you’ll work 18 stitches in total).
- Finishing the Ear Cone: Time to taper the top of your ear!
– Round 6: Chain 1, sc in each of the first 3 stitches, then 2 together in the next. Repeat (14 stitches total).
– Round 7: Chain 1, sc in each of the first 2 stitches, then 2 together in the next. Repeat (10 stitches total).
– Round 8: Chain 1, sc in each of the first stitch, then 2 together in the next. Continue until you have 5 stitches left.
- Close the Ears: Finish off your ears. Cut the yarn, leaving a 6-inch tail for sewing. Pull through your last stitch to secure it.
Adding Character to Your Ears
To complete the cute cow look, you can add some inner ear details. Use your pink yarn (or any color of your choice) and crochet a smaller oval shape following similar steps as above but with fewer stitches. Sew this into the bottom of each ear for a contrasting effect.
Finally, attach the ears to your hat using the tail you left for sewing. Position them symmetrically on either side for the best look. You can really have fun with the size and shape of the ears, so feel free to adjust as you like!
Remember, each ear is uniquely yours! With a bit of practice, you’ll be creating charming hats that spread joy to everyone around you. Embrace the process, enjoy the crafting, and most importantly-have fun! You can do this!
Finishing Touches: How to Sew and Assemble Your Hat
As you wrap up your delightful cow hat project, it’s time to focus on the final touches that will bring your creation to life! Sewing and assembling your hat might seem daunting, but with a few simple steps and a sprinkle of patience, you’ll achieve a polished look that showcases your hard work. Believe it or not, this is where the magic happens, transforming individual pieces into a fun accessory that truly stands out.
Start by gathering your materials: a tapestry needle, scissors, and any additional yarn or embellishments you want to use. If you haven’t already, ensure all components of your hat-including the base, ears, and spots-are crocheted and ready to assemble. Aim to set aside about 30 minutes for this part of the process; you’ll want to take your time to get everything just right.
Step-by-Step Assembly
- Positioning the Ears: Begin by deciding where to attach the ears on your hat. A good rule of thumb is to place them around 2-3 inches down from the top. Use your tapestry needle and yarn tail from the ears to sew them securely to the opposite sides of the hat.
- Sewing the Spots: Next, it’s time to add those iconic black and white spots. Position them anywhere you like on your hat; feel free to make it unique! Secure each spot with a few stitches, ensuring they are well-attached but not so tight that they lose their shape.
- Finishing Up: Finally, weave in any loose ends from your previous stitches. This helps maintain a neat look and prevents any yarn from unraveling. Remember to trim any excess yarn, and give your hat a gentle shake to rearrange the pieces. Your cow hat is almost ready!
To truly make this cow hat your own, think about personal touches-consider adding embellishments like a cute ribbon or buttons that match the theme. This turns an already charming project into something uniquely yours. Celebrate your progress and remember that every little imperfection adds character to your handmade masterpiece. So go ahead, put on your new hat, and strut your stuff! You’ve crafted something fantastic, and you absolutely can do this. Enjoy the process and share your adorable, fun cow hat with friends and family; they’ll love it just as much as you do!
Personalizing Your Cow Hat: Fun Variations and Ideas
There’s nothing quite like a cozy cow hat to bring a smile, and personalizing your creation can elevate it from adorable to uniquely yours! Embrace your creativity by experimenting with various embellishments, colors, and techniques that reflect your personality or even seasonal themes. Whether you want to add a splash of color or create a themed hat, here are some delightful ideas to get you started.
- Color Variations: While the classic black and white spots are charming, consider using shades like brown or cream for a different take. You could crochet multicolored spots for a whimsical twist, or even a pink cow hat for a cute style that’s off the beaten path.
- Textured Spots: Try out different stitch patterns for your spots! Instead of just simple single crochet, experiment with bobble stitches or puff stitches for a 3D effect. This not only adds depth but also makes your hat super fun to touch.
- Ear Details: Don’t stop at simple ears! Add contrast by crocheting a lining in a different color, or even incorporating cute features like inner ear designs that mimic the texture of actual cow ears.
- Embellishments: Make your hat even more special by attaching cute accessories like felt flowers, buttons, or even tiny bells that jingle when you move. A little ribbon tied around the base can add a charming flair-it’s a simple addition that makes a big impact.
- Seasonal Themes: Switch things up for holidays! For Halloween, you could create a spooky cow with some playful modifications, like adding little fangs or using glow-in-the-dark yarn. For Christmas, consider a festive version with red and green spots or add a Santa hat effect on top.
Remember, there’s no wrong way to personalize your cow hat; the goal is to make something that brings you joy and showcases your creativity. Every stitch is a step in your crafting journey, and each variation reflects your own style. So gather your yarn, let your imagination roam, and have fun creating a cow hat that’s truly one-of-a-kind! You absolutely can do this, and your finished product will not only keep you warm but also shine with your unique personality. Happy crocheting!
Troubleshooting Common Crochet Issues
When venturing into the world of crochet, a few hiccups can pop up, especially when crafting something as fun and intricate as a cow hat. Don’t worry; every crochet enthusiast has faced challenges, and troubleshooting is part of the crafting journey. Let’s tackle some common issues you might encounter while crocheting your adorable creation.
Common Issues and Solutions
One common problem is uneven stitches. If your cow hat looks more wobbly than cuddly, it may be due to tension inconsistencies. To fix this, consciously check your grip on the yarn. Consider practicing with a similar yarn until you find a tension that feels comfortable and results in even stitches. Also, don’t be shy about frogging (ripping back) a few rows if needed; you’ll be surprised how much better it looks when you correct those stitches!
Another concern might be running out of yarn midway through a project. This can be alarming, especially if you’re near the top of your hat! Always check your pattern’s yardage requirements and weigh your yarn before starting. If you do run out, try to purchase another skein from the same dye lot to match the color. If that’s not possible, consider creatively switching to an accent color or stripe that complements your original yarn.
Fixing Shape and Fit
Sometimes, you might find that your hat is too snug or too loose. To adjust, make sure to measure your head circumference accurately before starting. If your current hat is too tight, you can try using a larger hook size for the next project or adding a few more stitches to your pattern to give it more elasticity. A stretchy band can also help to fit it snugly.
On the flip side, if the hat is too loose, you might want to consider using a smaller hook or incorporating a tighter stitch in the body of the hat. A simple solution for a hat that’s too big is to add a liner that fits tightly against your head or incorporate a drawstring to adjust the size.
Final Touches
As you complete your cow hat, you might notice that the spots aren’t as symmetrical or defined as you envisioned. Don’t fret! Adding texture with bobbles or raised stitches can create a fun look and help mask unevenness. Plus, embellishments like stitched lines around the spots can give them a sharper, more defined look.
Remember, every crochet project is a chance to learn and grow. Mistakes make the process engaging and teach you valuable skills for your next project. You’re building your crafting experience with each stitch, and no one else’s hat is exactly like yours. So dive back in with confidence-you’ve got this! Happy crocheting!
Tips for Making a Perfectly Fitting Hat
When crafting your cow hat, achieving the perfect fit can make all the difference between a cute, comfortable accessory and an oddly shaped decor piece. Don’t worry if you’re new to crochet or if your previous projects haven’t turned out as expected; this is an opportunity for growth! A well-fitted hat not only looks adorable but is also enjoyable to wear, whether for a costume party, a chilly day, or just for fun.
Start by accurately measuring your head circumference. Use a soft measuring tape and wrap it around the fullest part of your head, usually just above your ears. Write this measurement down; it’s your foundation for fitting success. If you’re crocheting for someone else, sneakily grab their dimensions or compare with a hat they already own for reference. Remember, every head shape is unique, so this personal touch is key!
Before you begin crocheting, take a few moments to swatch your yarn with the hook size you’ll use for the hat. This will give you a sense of how the yarn behaves and can help you adjust your tension. If your swatch measures smaller than expected, switch to a larger hook size or slightly loosen your grip on the yarn as you work. Conversely, if it’s too large, switch to a smaller hook to ensure that your hat will hug your head snugly without being uncomfortably tight.
As you crochet the hat, regularly try it on to ensure it fits well. This is particularly important if you’re adding any features like ears or spots, as they can change the overall structure. If the hat feels tight as you progress, you can always add a few extra stitches. Conversely, for a looser fit, consider decreasing stitches or using a smaller hook. If you’ve already completed the hat and it’s a touch too big, don’t fret! A simple liner can be added inside for extra snugness, or you can create a drawstring adjustment at the base.
Remember, everyone’s crochet journey is filled with experimentation. Each project brings with it a chance to refine your skills. Celebrate the process, embrace those little adjustments along the way, and soon you’ll have a cow hat that not only looks fantastic but fits just right. You’ve got this! Happy crocheting!
Easy Care and Maintenance for Crochet Hats
When you put the time and love into crafting a delightful cow hat, it’s just as important to care for it properly so it stays looking fabulous for the long haul. Crochet hats, especially those made with charming details like black and white spots and floppy ears, deserve a bit of TLC. Learning to maintain your creation not only extends its lifespan but also enhances your enjoyment of the finished product.
Start with washing. Most crochet hats can be safely hand washed to avoid damage. Fill a basin with cool water and add a gentle detergent or a wool wash. Let your hat soak for about 10-15 minutes, then gently agitate the water with your hands. Rinse it thoroughly in cool water to remove any soap, and avoid wringing it out to prevent stretching. Instead, place your hat flat on a clean towel, roll it up gently, and then lay it flat to dry in its original shape. This method helps maintain the integrity of your yarn and the structure of your hat.
Storage Tips
When it comes to storing your cow hat, keep it in a cool, dry place away from direct sunlight. Avoid hanging it, as this can cause it to lose its shape. Instead, opt for a clean shelf or a drawer where it can sit comfortably. If your hat has any embellishments or additional details, consider using a hat box or a breathable fabric bag to prevent any snagging or crushing. You can line the box with tissue paper to help maintain its shape, ensuring your adorable design is always ready to impress.
Additionally, keeping your hat away from pets and dust is useful. If you have furry friends at home, consider placing your hat in a storage bag when it’s not in use. Using a lint roller or a sticky tape can help keep it free from dust and pet hair if necessary. Following these simple care instructions ensures that your handmade hat remains an eye-catching accessory, ready for any adventure or cozy day at home. Remember, caring for your crochet projects is just as rewarding as creating them, so you can wear your cow hat with pride for years to come!
Showcase: Real-Life Cow Hat Projects from Crafters
Seeing the creativity and unique styles in real-life cow hat projects can be incredibly inspiring! Each crafter brings their own flair, transforming a simple pattern into personal statements that reflect their personalities. Whether it’s adding playful expressions, using vibrant colors, or experimenting with texture, these creations show just how versatile and fun crocheting can be.
A lovely project by Jennifer, a passionate crocheter from California, showcased her cow hat adorned with cheerful pastel spots. She used a lightweight cotton yarn, perfect for warm weather, making it not just cute but also comfy. Jennifer shared her adaptation of the pattern in a blog post, where she included her tips for achieving the delightful spots that popped against the white base. Her advice? “Don’t be afraid to mix colors! Making spots in unexpected shades of blue and pink gave my hat a whimsical twist,” she said.
In another delightful example, Marcus from Texas crafted a cow hat for a child’s birthday party. He opted for a fluffier yarn to create a snug, cozy feel and used safety eyes to give the ears a friendly, cartoonish look. His hat featured an impressive set of floppy ears that seemed to bounce with every movement! Marcus emphasized the importance of using stitch markers to keep track of rows, especially when working on larger projects like hats. “It’s so satisfying to watch it come together,” he exclaimed, showing that the journey of making is just as enjoyable as the finished product.
These stories remind us that every cow hat is more than just a project; it’s a reflection of creativity and personal style. If you’re planning to make your own, consider the textures, colors, and added personal touches that resonate with you. Remember, the joy lies in the process, and every stitch brings you closer to creating a wear-worthy piece that’s uniquely yours. So grab your hooks and yarn, and let your own cow hat project tell your story!
Q&A
Q: What materials do I need to crochet a cow hat with black and white spots?
A: To crochet a cow hat with black and white spots, you’ll need medium-weight yarn in black and white, a crochet hook (typically size H or I), scissors, and a yarn needle for weaving in ends. You might also want stitch markers to help keep track of your rounds.
Q: How long does it take to crochet a cow hat?
A: Crocheting a cow hat typically takes 2 to 4 hours, depending on your skill level and whether you take breaks. If you’re a beginner, you might want to budget extra time as you get familiar with the stitches and techniques.
Q: Can I customize my cow hat design?
A: Yes! You can customize your cow hat by changing the colors, adding different patterns for spots, or even making larger or smaller ears. For more ideas, check the Personalizing Your Cow Hat section in the article.
Q: What is the best way to care for my crocheted cow hat?
A: To care for your crocheted cow hat, hand wash in cold water using mild detergent. Lay it flat to dry instead of hanging it up, which can stretch the shape. Always check the yarn label for any specific care instructions.
Q: What should I do if my crochet hat is too small?
A: If your crochet hat is too small, try using a larger crochet hook for your next project, or consider adding a few extra rows to increase the size. You can also stretch it gently while damp to fit better.
Q: How do I add black and white spots to my cow hat?
A: You can add spots by using a slip stitch or a single crochet in black yarn after completing the base hat in white. Place spots randomly for a natural look. Refer to the Adding Black and White Spots section for detailed instructions.
Q: Are there beginner-friendly patterns for cow hats?
A: Yes, many beginner-friendly patterns are available online. Look for tutorials that provide clear, step-by-step instructions along with pictures or videos. The Basic Crochet Techniques section of the article is a great starting point for new crocheters.
Q: What if I encounter difficulty while crocheting my cow hat?
A: If you encounter difficulties while crocheting, don’t hesitate to refer to the Troubleshooting Common Crochet Issues section in the article. Additionally, many online forums and video tutorials can provide support and tips for resolving specific problems.
Concluding Remarks
Congratulations on mastering the art of crocheting your very own Cow Hat with adorable black and white spots and floppy ears! This delightful project not only showcases your creativity but also adds a whimsical touch to your winter wardrobe. Remember, the only limits are the ones you set for yourself-so don’t hesitate to experiment with colors and patterns. You did great, and just think how much fun it will be to wear or gift your handmade creation!
Ready to continue your crochet journey? Why not check out our complete guide on basic crochet techniques at Sarah Maker or delve into more fun projects like the popular crocheted animal hats that will bring joy to both you and your loved ones. If you’ve enjoyed this tutorial, drop a comment below sharing your thoughts or any questions you might have-we love hearing from our crafting community! Don’t forget to subscribe to our newsletter for more exciting projects and crochet tips delivered straight to your inbox. Keep creating and crocheting, because you can do this!
Get our latest guides, news, and insights highlighted in your Google Search & AI Overviews.