
Looking to add a delightful touch to your crochet hat? Making a fluffy pom pom is an easy and rewarding way to elevate your project! Whether you’re a novice or have been crocheting for years, adding this charming topper can bring your hats to life and add a cozy flair. Not only do pom poms provide a playful aesthetic, but they also allow you to personalize your creations with color and size to match your style. In this tutorial, I’ll guide you step-by-step through the process of crafting your own pom pom, highlighting the materials you’ll need and the techniques that make it a breeze. You’ll see just how satisfying it is to make your own accessories, so grab your yarn and let’s get started-because you can totally do this!
Choosing the Right Yarn for Your Pom Pom
Choosing the perfect yarn for your pom pom can make all the difference in achieving that fluffy, delightful topping for your crochet hat. The variety of yarn available opens up a world of possibilities, but not all fibers are created equal when it comes to creating beautiful pom poms. Generally, you’ll want to consider factors such as texture, weight, and color to ensure your pom pom complements your crochet creation.
For a beginner-friendly option, consider using acrylic yarn. It’s widely available, affordable, and comes in an array of vibrant colors. This type of yarn is also lightweight and has a good amount of bounce, making it easier to fluff up your pom pom. If you’re aiming for a softer, more luxurious look, wool or blend yarns are excellent choices. These materials tend to create denser and fluffier pom poms, giving your hat a cozy feel perfect for chilly days.
When selecting yarn, don’t forget about weight consistency. Choosing a yarn that matches the thickness of your hat’s main yarn will ensure your pom pom sits well on top. For those looking to experiment, variegated or textured yarns can add visual interest and depth to your pom pom. Just remember, the more textures and colors you add, the more chaotic the pom pom may appear, so balance is key.
Lastly, if you’re making pom poms as a fun collaborative project with kids, opt for chunky yarns. They’re easier to handle and create a sturdier pom pom that’s perfect for little hands. With the right yarn in tow, you’re already on your way to crafting a stunning piece that will enhance your crochet hat beautifully. Embrace the joy of experimenting with different yarns-each pom pom will tell its own unique story!
Essential Tools You Need for Pom Poms
To create beautiful and fluffy pom poms, you’ll need a few essential tools that will help streamline the process and make crafting enjoyable. Gather these items before you dive into making your pom poms to ensure a smooth and successful crafting experience.
First and foremost, having a good pair of scissors is crucial. Sharp scissors will help you trim your pom poms evenly and achieve that perfect round shape. Additionally, a pom pom maker can be a game-changer if you want consistent results. These handy tools come in various sizes and make it easier to wind yarn, creating uniform pom poms with minimal effort. If you don’t have a pom pom maker on hand, don’t worry! You can easily create pom poms using just your fingers or cardboard templates, proving that this craft is accessible to everyone.
Next, keep some yarn needles or darning needles nearby. These will be instrumental when it’s time to secure your pom pom tightly and attach it to your crochet hat. Using a needle allows you to maneuver the yarn easily and weave it in without creating bulk. Furthermore, a small piece of sturdy cardboard can be useful for those who prefer a DIY approach, serving as a template to cut your yarn and get the desired thickness for your pom poms.
Lastly, remember to have a workspace that allows you to comfortably craft. A flat surface will help you trim your pom poms and gather stray fibers. Don’t forget to bring your creativity! Experimenting with different yarn colors and textures can lead to delightful results, so let your imagination run wild. With these tools and a little patience, you’re well on your way to crafting stunning pom pom toppers for your crochet hats. You can do this, and the joy of creating your own unique designs is waiting for you!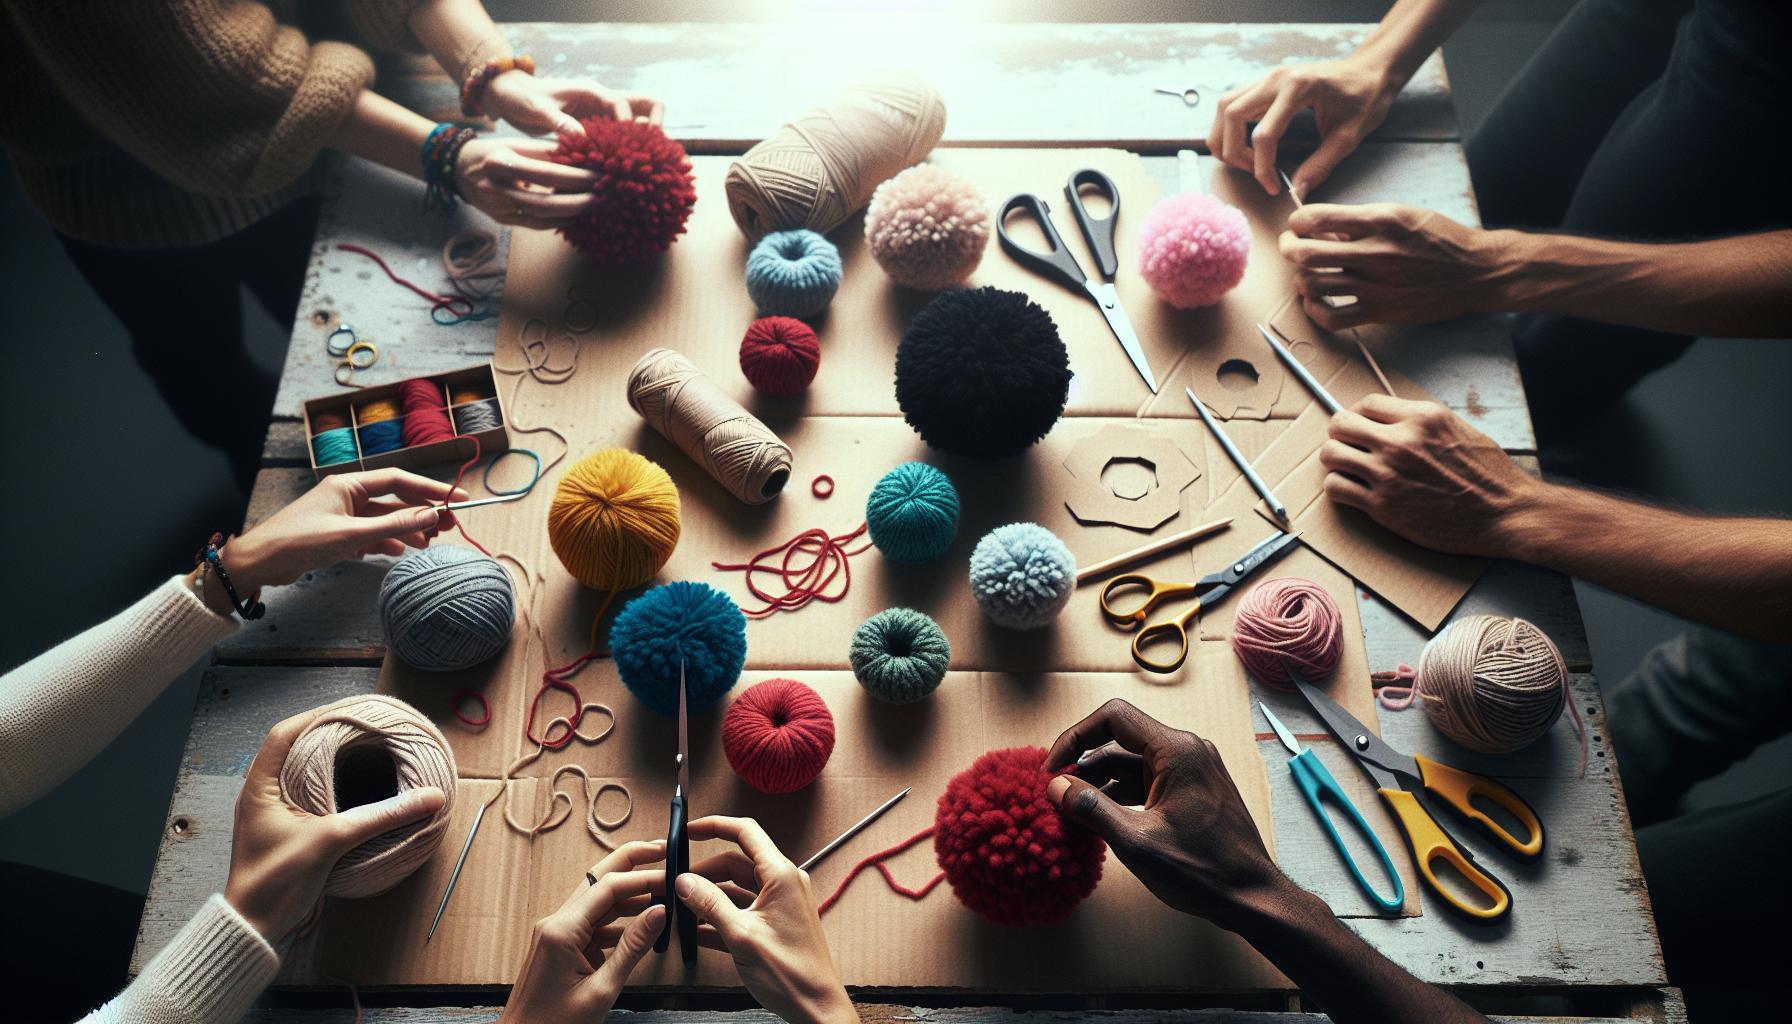
Step-by-Step Guide: Making a Basic Pom Pom
Creating your very own pom pom is a delightful experience that adds flair to any crochet hat! It may seem a bit daunting at first, but with a few simple steps and some practice, you’ll be making fluffy pom poms in no time. Whether you’re a beginner or a seasoned crafter, this guide will help you produce perfectly round, soft pom poms to top off your hats beautifully.
To start, gather your materials. You’ll need your choice of yarn, scissors, and either a pom pom maker or some sturdy cardboard. Using a pom pom maker can simplify the process, but if you prefer a DIY method, you can easily create your own templates. For a quick and effective approach, cut a piece of cardboard into two identical circles with a smaller circle cut out in the middle, leaving a donut shape. This will serve as your winding tool.
Steps to Make Your Pom Pom
- Wrap the Yarn: Begin by wrapping the yarn around your pom pom maker or cardboard template. Aim for 40-60 times, depending on how fluffy you want your pom pom. The more you wrap, the fuller it will be!
- Secure the Yarn: Once you’ve achieved the desired thickness, carefully slip a piece of yarn through the center of the maker or between the cardboard layers. Tie it tightly in a knot to hold everything in place.
- Trim and Shape: Use your scissors to cut through the yarn around the edges. This is where you’ll see your pom pom come to life! Trim any uneven edges to achieve a nice round shape.
- Attach to Your Hat: Finally, use your yarn needle to weave the knot you created earlier into your crochet hat. Secure it well to ensure it stays in place during wear.
With practice, you’ll get a feel for how much yarn to use and how to shape your pom pom perfectly. Don’t hesitate to experiment with different yarn textures and colors; each combination offers a unique look! Remember, this is all about having fun and expressing your creativity. So roll up those sleeves, grab your supplies, and get ready to craft some fluffy pom poms! You can do this, and the satisfaction of seeing your finished creation will make it all worth it.
How to Attach Your Pom Pom to a Hat
Attaching your freshly crafted pom pom to your crochet hat is the final touch that transforms a lovely piece into a stunning accessory! Whether you’re aiming for a snug fit or a playful pop atop your hat, securing that pom pom correctly is key to showcasing your creativity. Plus, it’s easier than you might think, and with the right approach, you’ll have a secured pom pom that looks adorable and remains in place through all your winter adventures.
Begin by positioning your pom pom where you’d like it to sit on the hat. This is a good time to experiment a bit with placement; moving it around can help you find the perfect spot that feels balanced and aesthetically pleasing. Once you’ve settled on the best position, grab your yarn needle and a length of yarn, ideally the same yarn used for your pom pom for consistency. You might want to double the yarn for extra durability.
To attach, thread the yarn through the needle and start by going through the center of the pom pom, coming out from underneath. Pull through gently, then stitch into the hat at your designated location. It’s helpful to make several passes-think of it like weaving in ends. Loop the yarn around the base of the pom pom and back into the hat a few times, adjusting for tightness. Aim for a snug fit but avoid over-pulling, which could distort the pom pom’s shape. Finish by tying a secure knot inside the hat, ensuring the pom pom can withstand wear and tear.
For added security, consider using a small dab of fabric glue on the underside of the pom pom before securing it. This can help to keep everything in place, especially if your hat tends to take on a bit of rough and tumble in your daily activities. Voila! You now have a vibrant, fluffy pom pom attached to your hat, ready to bring a splash of fun and warmth to your winter wardrobe. Remember, this is all about enjoying the process and experimenting with styles, so feel free to get creative with your attachments-after all, you can truly make this your own!
Creative Variations: Color and Size Combinations
Creating pom poms can be a delightful and colorful endeavor, allowing your creativity to shine through in your crochet hats. One of the best parts of making pom poms is experimenting with different color and size combinations, which can completely transform the look of your finished project. Whether you’re aiming for a subtle, monochromatic scheme or a bold, multi-colored statement piece, the options are endless!
When it comes to color combinations, think about the palette of the hat itself. Complimentary colors can make your pom pom pop, while analogous colors from the same family provide a more harmonious look. For instance, if you’re working with a deep burgundy hat, a vibrant mustard pom pom creates a striking contrast, whereas soft pinks and reds yield a charming, cohesive effect. Mixing yarns can also add texture. Try using a fuzzy yarn mixed with a smooth yarn to create a visually interesting pom pom that catches the eye.
As for sizes, don’t hesitate to play around! Larger pom poms often convey a whimsical, playful vibe and can be a great addition to slouchy hats or beanies, creating a fun, oversized look. Smaller pom poms can be used for more delicate hats or layered for added depth. You could create a stacked pom pom effect, where multiple pom poms of varying sizes are layered on top of each other, adding a funky twist to traditional designs.
Finally, consider integrating patterns into your pom pom. Striped pom poms can be made by using two different colored yarns wound together, or you can try a two-tone pom pom technique, where the top half is one color and the bottom half another. This playful touch can elevate your hats and make them truly one-of-a-kind. Remember, experimenting is part of the fun-you can do this, and every pom pom you make is a step toward mastering your craft!
Tips for Creating Perfectly Fluffy Pom Poms
Creating fluffy pom poms is not just about having the right materials; it’s about mastering a few essential techniques that will elevate your crafting game. One of the best parts of making pom poms is the joy you feel when those fluffy spheres come to life! With the right approach, you can achieve that dreamy volume that looks wonderful atop your crochet hats.
To get started on creating seriously fluffy pom poms, consider the type of yarn you’re using. Thicker, loftier yarns like chunky acrylic or wool blends yield beautiful results, but using a mix of yarn types can enhance fluffiness too. For instance, combining a smooth yarn with a fuzzy one can introduce texture and dimension. Tip: Use yarn that has a bit of halo, as it tends to create a softer look. Layering also matters-when winding your yarn, don’t skimp on the number of strands; a minimum of 8-10 can make a noticeable difference in the final fluffiness.
Shaping Your Pom Pom
Once you’ve gathered your yarn, it’s time to focus on the shaping. When you’re ready to cut your pom pom, make sure your scissors are sharp. A clean cut is crucial for a nice rounded shape. After snipping the yarn, gently squeeze and fluff the ball to separate the fibers without pulling them out. This helps create that round, bouncy character everyone loves in a pom pom. Remember, you can always trim a bit more if necessary, so don’t be afraid to give it a good shake!
Finishing Touches
Finally, the tying technique can make all the difference. Use a durable thread or the same yarn to tightly secure the center of your pom pom before trimming. This not only gives your pom pom more structure but also helps keep all those lovely fibers in place. Run your fingers through the pom pom after trimming-it’s perfectly okay to get a little messy!
Ultimately, practice makes perfect, so keep experimenting until you find your ideal method. Each pom pom is a unique creation, and even if they don’t all turn out exactly as planned, embrace the charm of your handmade work. Remember, you’re not just crafting pom poms; you’re crafting joy and color into your life!
Troubleshooting Common Pom Pom Issues
Creating pom poms can sometimes lead to unexpected challenges, but don’t worry! These hurdles are part of the crafting journey, and armed with a few tricks, you can tackle them with confidence. Whether you’re facing a lopsided pom pom or struggling with loose yarn, troubleshooting common issues will help you refine your technique and create those fluffy toppers for your crochet hats that you’ve been dreaming of.
One common issue is having your pom pom turn out flat or lacking volume. To avoid this, make sure you’re wrapping your yarn firmly and using enough strands-aim for at least 8-10. If you’re feeling your pom pom is still not fluffy enough, try using a loftier yarn with a bit of halo, or even combine different textures for a more dynamic look. Remember to fluff and trim enthusiastically after cutting the ties; gently shaking it can also encourage a fuller shape.
Another frequent problem is the tie breaking or feeling insecure, which can lead to a messy pom pom. To combat this, use a strong thread or the same yarn you used for wrapping and double-knot it securely in the center. This not only fortifies your pom pom but helps keep all those fibers neatly packed. If your pom pom still seems unruly, don’t hesitate to trim more, focusing on creating a nice round shape. Just take your time-trimming is part of the fun!
Lastly, if you find your pom pom shedding fibers, this could be a sign of cheap yarn or improper tying. Ensure that your pom pom is tightly secured in the middle during the tying process, and consider upgrading to a higher-quality yarn for less fuzz and more flair. Embrace the learning process; each pom pom you make will improve your skills and help you discover what works best for you. Happy crafting!
Incorporating Themes: Seasonal Pom Pom Ideas
Creating seasonal-themed pom poms is a delightful way to add charm to your crochet hats while celebrating the unique vibes each season brings. Whether it’s the vibrant colors of autumn leaves or the soft pastels of spring blooms, your pom poms can reflect these themes beautifully. Let’s explore some fun ideas to inspire you as you craft your next cozy accessory!
Fall Festivities
As autumn approaches, consider incorporating warm, earthy tones into your pom poms. Yarns in burnt orange, deep burgundy, and mustard yellow can evoke the essence of fall leaves. You might also mix in some metallic threads to create a slight shimmer that mimics the glow of fall sunsets. For a fun twist, try making small pom poms with a more rustic look using a textured yarn, and attach several of them together for a cluster effect on your hat.
Winter Wonderland
When it’s time for winter crafting, think about snowflakes and festive cheer! White, icy blue, and silver yarns can give your pom pom a frosty appearance, perfect for those chilly days. You could also create multi-colored pom poms using a blend of white and pale blue to mimic snowflakes on crisp winter mornings. For added flair, use a sparkle yarn or attach tiny faux icicles or beads to create a magical winter theme.
Spring Awakening
With spring comes the chance to play with soft colors and floral inspirations. Utilize pastel shades like lavender, mint green, and baby pink to craft cheerful pom poms that feel fresh and lively. You can even add bits of floral embroidery or small fabric flowers to your pom poms to resonate with the bloom of the season. This not only enhances the texture but also gives your hat a unique, garden-inspired touch.
Summer Vibes
For the summer months, think bright and bold! Yarns in sunshine yellow, vibrant coral, and ocean blue can bring a lively flair to your hats. Consider creating oversized pom poms to match the fun-loving spirit of summer outings. You might also incorporate variegated yarn for a fun, sun-kissed effect that captures the essence of the season. Adding lightweight fabric or elements like tassels can enhance the beachy vibe, making your hat truly stand out.
Remember, you can adjust the color and size of your pom poms to match your personal style or specific seasonal occasion. The key is to experiment and have fun with different textures and combinations. No matter the season, these little fluffy toppers can bring joy and personality to your crochet hats-embrace the creative process, and you’ll find that every pom pom you make is a step towards mastering your craft!
Using Pom Poms in Other Crochet Projects
Adding pom poms to various crochet projects is an exciting way to inject personality and flair. These fluffy adornments aren’t just for hats; they can enhance a wide range of items you create. Whether you’re sprucing up a blanket, personalizing a bag, or making unique gifts, pom poms can elevate your craftsmanship.
To start, consider using pom poms as fun accents for blankets or throws. You can attach them at the corners or along the edges of your cozy creations. Simply make several pom poms in complementary colors to your blanket and sew them on for delightful visual interest. This is a great way to use up leftover yarn from previous projects, and it gives your blanket a playful touch, perfect for snuggling on colder evenings.
When it comes to crochet bags or purses, pom poms can serve as stylish embellishments. Create a series of small pom poms in different colors, and attach them to your bag’s strap or top edge. This not only adds character but also makes your accessory stand out. If you’re feeling adventurous, consider crafting a large pom pom to serve as a quirky bag charm. You can even experiment with contrasting colors or mixing textures-think a fuzzy pom pom on a smooth bag for eye-catching contrast!
Decorative ideas:
- Scarves: Sew cute pom poms to the ends of your scarves for an extra touch of warmth and style.
- Stuffed Animals: Attach small pom poms for noses or tails on handmade toys to add a whimsical element.
- Gift Wrapping: Use pom poms as gift toppers-adhere them to wrapping paper or tie them onto the ribbon.
Embrace the joy of creating by experimenting with pom poms in your crochet projects! They are easy to make and offer limitless opportunities for customization. So, gather your yarn, make those fluffy balls, and let your creativity run wild. You can do this! Remember, the only limit is your imagination.
Care and Maintenance for Your Crochet Hat Pom Poms
Caring for your crochet hat pom poms is essential to keep them looking fluffy and vibrant. With just a few simple steps, you can ensure that your pom poms maintain their charm and remain a delightful accent on your favorite hats. One of the most important factors to consider is how to clean and refresh your pom poms without damaging them.
Start by gently combing through the pom pom with a wide-toothed comb or your fingers to untangle any knots in the yarn. This will help restore their shape and fluffiness. If your pom pom has become misshapen or flattened, you can fluff it up by giving it a good shake or lightly pulling at the individual strands. If necessary, you can use a bit of steam from a boiling kettle (keeping a reasonable distance to prevent any yarn from getting wet) to help reshape the pom pom fibers, giving them a more lively bounce.
When it’s time to wash your hat, detach the pom pom if possible to prevent any potential damage during the washing process. You can wash your pom pom by hand in lukewarm water using a gentle wool detergent. Swirl it around gently without agitating too much to prevent felting. Rinse thoroughly and gently press out the excess water-avoid wringing or twisting, as this can misshape the pom pom. Lay it flat on a towel, reshaping it as needed, and allow it to air dry away from direct sunlight to protect the color and fibers.
Lastly, store your crochet hats in a cool, dry place, avoiding stacking to prevent the pom poms from getting squished. If you notice your pom poms looking a bit sad after a season of wear, don’t worry! You can always give them a little love with some of these tips and figure out ways to repurpose them in other projects to keep your crafting spirit high. Remember, with a little care, your pom poms will remain striking additions to your crochet hats for years to come. You can do this!
Crafting with Kids: Fun Pom Pom Activities
Crafting with kids can turn an ordinary day into a whirlwind of creativity and fun, especially when it involves making pom poms! These fluffy little spheres not only bring joy to the crafting table but also serve as fantastic decorations for crochet hats, making them perfect for a project that parents and children can enjoy together. Best of all, creating pom poms is simple and requires minimal materials, so you can dive right in!
To start, gather a few basic supplies: yarn in your favorite colors, a pair of scissors, and something round to use as a pom pom maker-this could be anything from cardboard circles to your fingers! If you’re feeling adventurous, you can even create a homemade pom pom maker by cutting a simple cardboard disk with a hole in the center. This hands-on approach gives kids the chance to personalize their own tools! The process is exciting and can be broken down into just a few easy steps:
- Wrap the Yarn: Show your child how to wrap the yarn around the pom pom maker or cardboard circle. Encourage them to layer the yarn for a fluffier result; this is where they can add their own unique touch by mixing colors!
- Tie It Up: Once wrapped, help them tie a piece of yarn tightly in the middle to secure the yarn bundles. This stage is thrilling, as they will see the first glimpse of their pom pom forming.
- Trim the Edges: Next, cut the yarn loops around the outer edge. This step might get a little wild, so keep an eye on those scissors! Encourage your young crafters to give their pom pom a haircut for that perfect round shape.
- Attach and Display: Finally, assist them in attaching their pom pom to a crochet hat or other projects. This is a great time to talk about how different sizes and colors can change the look of their creations.
Engaging kids in crafting pom poms not only builds their fine motor skills but also boosts their confidence as they see their creations come to life. Plus, it’s a wonderful way to spend quality time together, fostering their creativity while nurturing their sense of accomplishment. Whether it’s for decorating hats, making unique gifts, or just for fun, you can rest assured-everyone will find joy in this colorful and fluffy activity. You can do this!
Inspiration Gallery: Stunning Pom Pom Hat Designs
Imagine cozying up on a chilly day, sporting a crochet hat topped with a fluffy pom pom that adds a delightful pop of personality to your outfit. The beauty of pom pom hats lies not just in their warmth but in their ability to reflect your unique style. Whether you’re feeling whimsical, bold, or classic, the designs possibilities are endless! Let’s explore some stunning pom pom hat ideas that will inspire you to create your own.
Start with a simple beanie, then get creative! Try combining vibrant colors and textures by using multiple yarn strands for the pom pom. A bright yellow pom pom on a rich burgundy hat can create a striking contrast. Or, consider a monochromatic theme with shades of blue-layering different hues of blue yarn can give your pom pom a beautiful depth. For a playful twist, why not use variegated yarn that changes color as you wrap? This results in a dynamic pom pom that catches the eye from every angle.
If you’re aiming for something truly unique, think about experimenting with different sizes. A mini pom pom on a snug-fitting hat exudes charm, while oversized pom poms can make a fun fashion statement. Don’t be afraid to mix textures either! A furry yarn pom pom can create an interesting contrast on a smooth crocheted surface. Remember, your creations should reflect your personality, so let your imagination run wild!
For those who love themed crafting, consider seasonal designs. A hat adorned with a whimsical white pom pom reminiscent of snow will be perfect for winter, while pastel-colored pom poms can brighten up any spring outfit. Incorporating fun shapes, like heart-shaped pom poms for Valentine’s Day, adds a lovely touch too. Whatever design you choose, remember that making it your own is key-after all, you can do this!
Faq
Q: How can I make a large pom pom for my crochet hat?
A: To make a large pom pom, use more yarn or a larger pom pom maker. Wrap yarn around the maker 20-30 times for a fuller look. After cutting and tying, fluff it well. This technique enhances visibility and adds a bold statement to your crochet hat.
Q: What type of yarn is best for making pom poms?
A: The best yarn for pom poms is a soft, bulky yarn like acrylic or wool blends. These materials provide volume and fluffiness. Explore various textures to add unique character-consider experimenting with textured yarns for creative flair!
Q: Can I make pom poms without a pom pom maker?
A: Yes! You can easily make pom poms using a piece of cardboard. Cut two circles with a center hole, wrap yarn around the outside, and tie tightly in the center. This method is both effective and budget-friendly for crafting enthusiasts.
Q: How do I secure a pom pom to my crochet hat?
A: To secure a pom pom, sew it onto the top of your crochet hat using a needle and matching yarn. Make several stitches around the base of the pom pom for stability. This ensures your pom pom stays in place even with regular wear!
Q: What mistakes should I avoid when making pom poms?
A: Avoid over-trimming your pom pom, which can lead to uneven shapes. Also, not tying tightly enough can cause the pom pom to unravel. Follow the detailed steps in your tutorial carefully to create a perfectly fluffy pom pom!
Q: How do I add multiple colors to my pom pom?
A: To create a multi-colored pom pom, alternate wrapping strands of different colored yarn around your pom pom maker or cardboard template. This mix yields a vibrant, eye-catching accessory for your crochet projects, adding a creative twist to your designs!
Q: Can I use scraps of yarn to make pom poms?
A: Absolutely! Using yarn scraps is a fantastic way to make colorful pom poms while minimizing waste. Simply blend different colors together to create unique and playful designs for your crochet hats or other projects!
Q: How do I keep pom poms from getting flat or misshapen?
A: To maintain the shape of your pom poms, store your hats in a way that prevents crushing. Fluff them up by gently shaking or using your fingers. Regularly care for them and avoid tight packing to keep them looking their best!
Wrapping Up
Congratulations on making your very own fluffy pom pom for your crochet hat! Remember, this fun project not only adds a cozy touch but also lets you express your unique style. If you loved this tutorial, check out our guide on “Crochet Hat Patterns” or dive into “Easy How-Tos for Beginners” to further enhance your crafting skills. Don’t forget to share your creations in the comments below or snap a picture and tag us on social media – we’d love to celebrate your hard work!
Feeling inspired? Now’s the perfect time to experiment with different yarns and sizes for your pom pom, or even try pairing it with other crochet accessories! Join our newsletter for more crafty tips and exclusive resources. You’ve got this, and we’re here to support you every step of the way. Keep creating, and remember, every yarn twist brings you closer to mastering new techniques! Happy crafting!
Get our latest guides, news, and insights highlighted in your Google Search & AI Overviews.